No products in the cart.
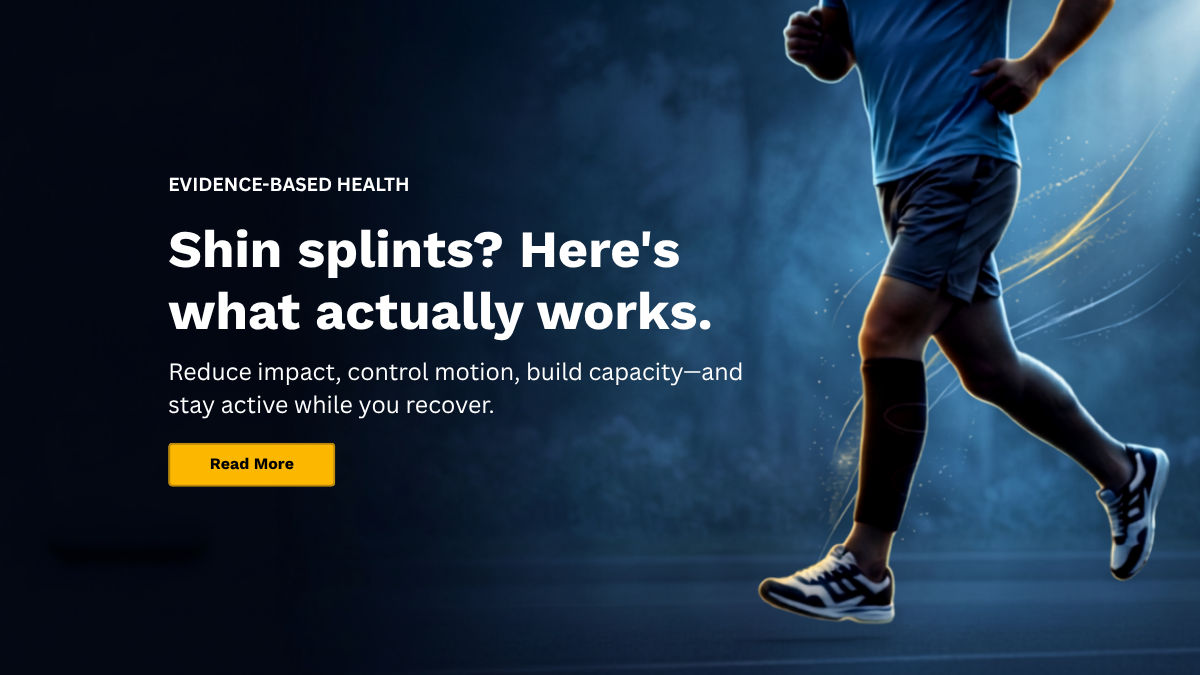
Why Do My Shins Hurt When I Run? Causes, Prevention, and What Actually Helps
Sharp pain along the inside of your shin. Dull ache that builds as you run. Tenderness when you press the bone. Worse when you push off, better when you rest. Sound familiar? You’re not imagining it.
You’re not alone. Shin pain is one of the most common running injuries, and it affects everyone from complete beginners ramping up their first Couch to 5K to experienced runners increasing mileage or coming back after time off. It’s frustrating, stubborn, and it has a habit of coming back just when you think it’s sorted.
Here’s what’s going on.
✅ Quick action checklist (if you have shin splints right now)
- ✅ Cut your running in half or rest completely if pain is severe
- ✅ Ice for 10-15 minutes, 3x daily (first 48-72 hours only)
- ✅ Check your shoes—replace if 500+ km or worn midsole
- ✅ Start eccentric calf raises (2 sets of 10, 3x per week)
- ✅ Add shock-absorbing or motion-control insoles
- ✅ See a physiotherapist if pain doesn’t improve in 2 weeks
Read on for the full guide.
What causes shin pain when running?
The most common cause is shin splints. That’s pain along the inside of your shinbone, where your calf muscles attach to the bone through a tough layer called the periosteum.
Every time your foot hits the ground, your calf muscles have to work to control how your foot rolls in and how much your ankle flexes upward. They’re lengthening under strain—eccentric loading—and that creates a pulling force where they attach to bone. Do this hundreds or thousands of times during a run, and that repetitive pull inflames the periosteum. That’s how shin splints happen.
The periosteum is packed with pain receptors (that’s why it hurts so much), but it doesn’t get much blood supply compared to muscle. So it heals slowly, and it can’t adapt as quickly when you ask more of it.
Other possible causes
Shin pain isn’t always shin splints. It could be:
- A stress fracture: A partial crack in the bone that can progress to a complete break if you keep running on it. Pain is more localized to one spot, severe, and doesn’t ease with rest. If you have sharp, pinpoint pain that’s getting worse, or pain at night or at rest, see a physiotherapist or GP urgently.
- Compartment syndrome: Dangerous pressure build-up in the enclosed spaces that hold your muscles, restricting blood flow. Causes severe pain, tightness, swelling, and sometimes numbness or tingling. This is a medical emergency—if you have these symptoms, get to A&E immediately.
- Nerve compression: Irritation of nerves in your lower leg or ankle can cause pain, numbness, tingling, or pins and needles. Feels different from the dull ache of shin splints.
- Tendon problems: Issues with your Achilles tendon or the tendons around your ankle can sometimes refer pain to your shin.
If you’re unsure what’s causing your pain, or if it’s severe, worsening, or doesn’t fit the typical shin splint pattern, get it looked at early. See the full red flag list in “When should I see a physiotherapist or GP?” below.
So what’s actually causing yours?
Why do shin splints happen? Common triggers
You’re asking your body to handle more than it’s currently able to without breaking down. What pushes you over the edge?
Training errors: too much, too soon
This is the big one—and the most common mistake.
Suddenly increasing your running mileage, adding speed work or hills, or ramping up training intensity without giving your body time to adapt. Going from 20 kilometres a week to 40 in a fortnight. Jumping straight into interval sessions after months off. Adding hill repeats when your legs aren’t ready.
Your body strengthens bone and connective tissue in response to strain—remodelling, the process where your bones get denser and stronger—but it takes time, much longer than muscle adaptation. Rapid training increases often outpace what your body can handle.
Hills and speed work are particularly high-risk because they increase that lengthening-under-strain pattern. Your calf has to work harder to control your foot and ankle while lengthening, which amplifies the pull where it attaches to bone.
If you’re new to running: Follow a proper beginner plan like Couch to 5K that builds gradually. Start with run-walk intervals (1 minute running, 2 minutes walking, for example) rather than continuous running. Run no more than 3 times per week with rest days in between. Choose softer surfaces like grass or trails for your first few weeks. Your bones, tendons, and connective tissue need time to adapt to the new demands.
How your body moves
If you have flat feet or overpronate (your foot rolls inward too much when you land), your shin rotates inward with each step.
That inward twist increases the strain where your muscle attaches to bone along the inner edge of your shinbone. That’s exactly where shin splint pain hits.
To check if you overpronate, try the wet foot test. Wet the sole of your foot, step on a piece of cardboard or dark paper, and look at the footprint. If you see almost your entire foot with a wide, filled-in arch area, you likely have flat feet and overpronate. If you see only a narrow strip connecting your heel and forefoot with a high, hollow arch, you likely underpronate. A neutral arch shows a moderate curve along the inside edge. This gives you a quick indication of whether corrective insoles for overpronation might help.
Tight calf muscles or limited ankle range mean your calves are working in a shortened, less efficient position, which increases the pull where they attach to bone.
Footwear issues
Worn-out running shoes lose their cushioning and support, increasing impact forces on your lower legs. Check your shoes. If they have more than 500 to 800 kilometres on them, they’re likely past their best. Press the midsole (the cushioned layer between the outer sole and your foot). If it stays compressed and doesn’t spring back, the cushioning is gone. Check the sole for uneven wear patterns too.
Shoes that aren’t suited to your foot type or gait can also contribute. Running shoes come in different support categories. Neutral shoes have minimal structure—they’re for runners whose feet don’t roll inward excessively. Stability shoes have firmer midsoles and support features to control overpronation. If you need stability support but wear neutral shoes, your foot motion won’t be controlled. If you don’t need stability support but wear stability shoes, they can feel stiff and restrictive.
To check whether you overpronate, use the wet foot test described earlier. For severe overpronation or if you’re unsure, a podiatrist can assess your foot mechanics and recommend appropriate support.
If you’ve recently switched to minimalist or barefoot-style shoes without a gradual transition, your calves are suddenly doing far more work than they’re used to, which can trigger shin splints.
Surface changes
Switching from softer surfaces like grass or trails to harder surfaces like concrete or tarmac increases impact forces because softer surfaces absorb some of the shock that would otherwise travel up through your leg. On concrete, your muscles, tendons, and bones absorb all of it.
If you need to change surfaces—moving from a grass pitch to road running, for example—do it gradually. Start with one road run per week while keeping the rest on softer ground. Add one more road run every two weeks. Over four to six weeks, gradually shift the balance. Your body needs this time to adapt to the increased impact. Sudden surface changes are a common trigger for shin splints, especially in runners who’ve been training exclusively on one surface type.
Sudden increases in standing time
It’s not just runners. If you’ve started a new job that involves long periods on your feet—nursing, retail, warehouse work, hospitality—or if you’ve suddenly increased your standing time, your lower legs are under more strain than they’re used to. Standing for hours requires constant low-level calf contraction to maintain balance and posture, which creates repetitive pull where your muscle attaches to bone.
If you can’t reduce time spent on your feet, focus on supportive footwear, compression support during shifts, and calf stretching breaks every one to two hours (30 seconds per leg). Strengthening exercises outside work hours also help. Gradually building standing tolerance is just as important as building running tolerance.
How do I start treating shin splints?
Shin splints respond to the right approach. Start by easing off and addressing the basics.
Immediate steps: ease off
If your pain is recent and severe—sharp pain that stops you from running—rest is your priority. That doesn’t mean complete inactivity, but it does mean stopping or significantly reducing the activity that’s causing the pain. Give the inflammation a chance to settle, one to two weeks until you can walk without pain and press your shin without sharp tenderness.
Once the acute inflammation has settled, shift from rest to managing how much you do. Cut your running in half—if you were doing 20 kilometres a week, drop to 10—rather than stopping completely.
Ice can help in the first few days if there’s swelling or acute pain. Ice constricts blood vessels, which reduces inflammation and numbs pain receptors. Use it in the first 48 to 72 hours after pain starts—after that, inflammation has peaked and ice is less effective. Apply a cold pack wrapped in a towel for 10 to 15 minutes, a few times a day. Don’t apply ice directly to your skin.
Training modification: build back gradually
Once you’ve cut your running in half, avoid hills, speed work, and hard surfaces like concrete or tarmac. Add extra rest days. Build back up gradually—no more than 10% increase in weekly mileage, and only if you’ve had a pain-free week at your current level.
If you’re running 20 kilometres this week, add no more than 2 kilometres next week. It gives your body time to adapt without tipping back into overload.
Keep your fitness up with low-impact activities like swimming, cycling, or the elliptical. These keep your cardiovascular fitness without aggravating where your muscle attaches to bone.
Footwear check: replace worn shoes
Replace worn-out running shoes (see ‘Footwear issues’ for how to check). If you overpronate, add corrective insoles to control excessive foot motion. Shock-absorbing insoles can help reduce impact forces for all runners with shin splints.
Running surface: choose softer ground
Run on softer ground—grass, trails, or synthetic tracks—while you’re recovering. Softer surfaces reduce impact forces compared to concrete or tarmac.
Why rest alone won’t fix shin splints (and how long recovery actually takes)
Here’s the trap: rest feels like progress, but it’s not enough.
Most people make the same mistake: rest until the pain eases, then go back to running at the same level. Pain returns. Why?
Rest eases the strain but doesn’t build strength. Where your muscle attaches to bone hasn’t got any stronger. Your calves aren’t more resilient. Your mechanics haven’t improved. You’re asking your body—which hasn’t adapted—to handle the same demands that caused the problem in the first place.
Long rest can actually reduce what your body can handle—muscles weaken, tendons soften, bones thin. You need some strain to help your body adapt, to get stronger and more resilient in response to that demand. You need to find the balance: enough to keep fitness and encourage healing, not so much you flare it up again.
Muscle repairs micro-damage in days to weeks. Where your muscle attaches to bone? Much longer. It can’t be rested completely—every step puts strain on it, even walking. Recovery is gradual. Do too much too soon? Setback.
If you haven’t addressed what’s making it worse in the first place—training errors, biomechanics, footwear—the pain often returns.
📅 Recovery timeline at a glance
- Mild shin splints (caught early): 2-4 weeks with rest and gradual return
- Moderate cases: 6-8 weeks
- Severe or long-standing: 3+ months, especially if you’ve been pushing through pain for weeks
Pushing through pain for weeks before addressing it extends recovery. Returning to full training too quickly triggers setbacks. Be patient and don’t rush the timeline.
How do I build back up safely and prevent shin splints returning?
Once you’ve eased off and addressed the basics, it’s time to build strength.
Insoles: reduce impact and control foot motion
Shock-absorbing insoles: Every time your foot hits the ground, impact forces travel up through your leg. Harder surfaces like concrete and tarmac create higher impact forces because they don’t absorb shock—your muscles, tendons, and bones absorb all of it.
Shock-absorbing gel insoles sit inside your running shoes and cushion each footstrike, reducing the peak forces that reach your shinbone and where your muscle attaches to it. They help all runners with shin splints, regardless of foot type or gait pattern.
Our FootReviver insoles for shin splints are designed with shock-absorbing gel cushioning—they fit inside most running shoes and can be trimmed to size.
Corrective insoles for overpronation: If you overpronate or have flat feet, corrective insoles can help control excessive foot motion and reduce strain where your muscle attaches to bone.
They support your arch and limit how far your foot can roll inward, which keeps your shin in better alignment throughout your gait cycle. This addresses the biomechanical factor that’s contributing to your shin splints.
Our FootReviver insoles for overpronation provide structured arch support to control excessive inward foot roll. You can use them on their own or combine them with the shock-absorbing insoles if you need both impact reduction and motion control.
For severe overpronation or significant structural issues where off-the-shelf insoles haven’t helped, custom orthotics—made from a mould of your foot by a podiatrist—might be appropriate.
Insoles reduce impact and control motion—they’re your first line of defence. But they don’t build strength. That’s next.
Calf strengthening and stretching: build resilience
Tight calves increase the pull where they attach to bone; weak calves can’t absorb shock effectively. Building calf strength and maintaining flexibility is foundational for long-term recovery and prevention.
A physiotherapist can assess your biomechanics and give you a plan built for you based on your specific biomechanics, training history, and pain patterns—addressing your individual weak points rather than generic exercises. For example, if you have weak hip stability, exercises will target that alongside calf work.
Eccentric calf raises (for shin splints):
- Stand on a step with the balls of your feet on the edge, heels hanging off
- Rise up onto both toes using both legs for the lift
- Shift your weight onto one leg
- Slowly lower that heel below the level of the step over 3 to 5 seconds (this is the eccentric phase)
- Control the descent—don’t drop
- Use both legs to rise back up, then repeat
- Do 2 sets of 10 reps per leg, three times per week
This might seem backwards: if that lengthening-under-strain pattern causes the problem, why would eccentric exercises help? Because controlled, gradual eccentric training builds your muscle-tendon chain’s ability to handle eccentric forces during running. You’re training the exact movement pattern that’s causing the problem, but in a controlled way that builds strength rather than exceeding it.
💡 Pro tip: Film yourself doing these on your phone. Check you’re not bouncing or rushing the descent—most people go too fast without realising it.
Soleus strengthening (seated calf raise): Sit with feet flat on the floor. Place a weight (dumbbell, heavy book, or backpack) on your thighs just above your knees. Raise your heels off the ground by pushing through the balls of your feet. Hold for 1 to 2 seconds at the top, then lower slowly. The bent knee position targets your soleus (the deeper calf muscle). Begin with 2 sets of 15 reps.
❌ Common mistakes:
- Bouncing at the bottom (defeats the eccentric work)
- Rushing the lowering phase (you need 3-5 seconds)
- Starting too heavy too soon (build gradually)
- Skipping rest days (your calves need 48 hours between sessions)
- Stopping when pain settles (continue for 8-12 weeks to build lasting strength)
⬆️ Progression: Once you can complete 3 sets of 15 reps with good form and no pain the next day, add weight. For eccentric calf raises, hold a dumbbell in the hand on the working side. For seated calf raises, increase the weight on your thighs. Progress weight by 2 to 5 kilograms every 2 weeks. If pain returns, drop back one level.
Return to running protocol
⏱️ When to start running again: Wait until you can walk briskly for 30 minutes without pain, hop on the affected leg 10 times without pain, and press your shin without sharp tenderness.
Week 1: Run for 10 minutes at an easy pace on soft ground (grass or trail). Walk for 5 minutes. Run for another 10 minutes. If you have no pain during or after, progress to week 2.
Week 2 onwards: Run for 15 minutes, walk 5 minutes, run 15 minutes. Continue this pattern, adding 5 minutes to each running segment per week, until you’re back to your pre-injury running time.
If pain returns: Drop back to what you were running the week before and stay there for another week before progressing again.
Compression support: reduce strain during recovery
A shin brace sits in the sweet spot between doing nothing and stopping completely. It’s not a substitute for rest if your pain is severe, but it can make the difference between stopping completely and staying active during recovery—carefully—while you heal.
How it works: Compression holds your calf in a stable, slightly compressed position. That stability cuts the pull where your muscle attaches to bone with each step and shortens your calf’s resting length slightly.
So when your foot lands and your ankle flexes upward, your calf muscle doesn’t have to stretch as far to control it. Less stretch means less peak pull when the strain is highest.
Compression also limits how much your muscle wobbles and vibrates with each step—that wobble creates repetitive micro-tugging. Compression dampens the wobble, cutting the cumulative micro-trauma over hundreds or thousands of steps. The brace also helps control swelling and supports blood flow back toward your heart after activity or during long periods on your feet.
When to use it: A shin brace is most useful during the transition phase—when you’re starting to put strain on the area again but it’s not fully healed yet, weeks 2 to 8 of recovery. Use it if you have mild to moderate shin splints and want to stay active during recovery, or if you’re on your feet all day (nurses, retail workers, warehouse staff) experiencing shin pain from prolonged standing. It’s not suitable for severe shin splints requiring complete rest, or suspected stress fractures—these need proper assessment first. Wear during activity for support, or after activity for recovery. Remove at night—do not sleep in it.
What to look for: Look for a brace with adjustable straps so you can customise the fit and compression level. Three independent straps give you the most control. The brace should be made from flexible, breathable material—look for neoprene, nylon-elastane blends, or moisture-wicking synthetic fabrics. Adjust straps for comfortable, supportive compression—snug but not tight. You shouldn’t feel numbness or tingling.
Our adjustable shin compression brace gives you three adjustable Velcro straps to dial in the exact support level you need—lightweight, fits most adults, can be worn on either leg.
⚠️ Safety note: If you have a history of blood clots, severe circulation problems, diabetes with reduced sensation, or unexplained swelling, check with your GP or physiotherapist before using compression support.
Running form: reduce impact forces
Overstriding—landing with your foot too far in front of your body—increases braking forces and impact. A shorter stride length and higher cadence (more steps per minute) can reduce these forces. Aim for around 170 to 180 steps per minute if you’re currently well below that.
To increase your cadence, try running to a metronome app set at 170 to 180 beats per minute, matching one foot strike per beat. To reduce overstriding, focus on landing with your foot under your hip rather than out in front of your body. A useful cue: “Run quieter”—aim to barely hear your footfalls. If you can hear a loud slap or thud, you’re landing too hard. Lighter, quicker steps naturally reduce impact forces.
Your footstrike pattern matters less than most people think (despite what running forums will tell you). Whether you land on your heel, midfoot, or forefoot isn’t as important as how hard you land. But if you’re a heavy heel-striker (landing hard on your heel with each step, creating a braking force), experimenting with a midfoot landing (landing with your whole foot at once, closer to flat) might reduce impact forces and help with shin splints. Try five minutes of midfoot landing during one run per week. Gradually increase if it feels comfortable and doesn’t cause new pain. A physiotherapist can assess your form and give you specific cues to reduce impact.
When should I see a physiotherapist or GP?
Most shin splints respond to self-management—rest, easing off, gradual return, and strengthening. But some situations need proper assessment.
🚨 Get it checked if you notice any of these:
- Pain is severe, sharp, or localized to one specific spot on your shin
- Pain doesn’t improve after two weeks of rest and managing how much you do
- Pain is present at rest or at night
- You have visible swelling, redness, or warmth over your shin
- You experience numbness, tingling, or pins and needles in your foot or lower leg
- Your shin feels unusually tight, or you notice muscle bulging
- You’re unsure whether it’s shin splints or something more serious
- You’ve had recurrent shin splints despite following the advice here
A physiotherapist can assess your biomechanics, identify what’s making it worse, and give you a personalised rehab plan. Your GP can rule out stress fractures, compartment syndrome, or other conditions that need different management.
Frequently asked questions
Can I run through shin splints?
Honest answer? It depends on how bad it is. If your pain is mild (low intensity, doesn’t worsen during the run, settles quickly after), you might be able to keep running—but do less—while you fix what’s causing it. But moderate to severe pain is different. If pain stops you mid-run, worsens as you go, or lingers for hours after, continuing to run will likely make it worse and extend your recovery time. Pain is your body’s warning system—listen to it.
Should I use heat for shin splints?
After the first 48 to 72 hours (once acute inflammation has settled), heat can help. It increases blood flow to the area, which supports healing and eases muscle tightness. Apply a warm (not hot) pack for 15 to 20 minutes. Contrast therapy—alternating cold and warm—can help in later recovery.
Will stretching help shin splints?
Stretching tight calves can help reduce the pull where they attach to bone, but stretching alone won’t fix shin splints—you can’t stretch your way out of a strength problem. You need to address the gap between what you’re doing and what your body can handle—that means strengthening, not just stretching. Combine calf stretches (hold for 30 seconds, repeat 2 to 3 times per leg, once or twice daily) with the strengthening exercises covered earlier.
Do compression socks help shin splints?
Compression socks or sleeves support blood flow and reduce muscle wobble, similar to the shin brace covered earlier. They’re most useful during activity or immediately after. But they don’t replace strengthening, managing how much you do, or addressing what’s making it worse. Think of them as a supportive tool during recovery, not a standalone fix.
Can I do other exercise while recovering from shin splints?
Yes. Low-impact activities that don’t strain your shins—swimming, cycling, elliptical, rowing—help keep your fitness up without aggravating where your muscle attaches to bone. Avoid high-impact activities like jumping, skipping, or running until your pain has settled.
Do I need shock-absorbing insoles, overpronation insoles, or both?
It depends on your foot mechanics and what’s driving your shin splints. Shock-absorbing insoles reduce impact forces—helpful for everyone with shin splints, especially if you run on hard surfaces like concrete or tarmac. Overpronation insoles control excessive inward foot roll—helpful if you overpronate or have flat feet. If you overpronate AND run on hard surfaces, using both together addresses both factors. If you’re unsure whether you overpronate, try the wet foot test described earlier. For severe or complex cases, a podiatrist can provide a detailed assessment.
I have a race coming up. Should I run it?
That depends on how severe your pain is and how much time you have. If your pain is mild and you have 4+ weeks until the race, you might be able to manage it by cutting back your training, using insoles, and wearing compression support. But if your pain is moderate to severe, or you have less than 4 weeks, running the race risks worsening the injury and extending your recovery by months. A physiotherapist can assess your specific situation and advise whether it’s safe to proceed.
The bottom line
Shin splints are stubborn. But they’re not unbeatable. They respond to smart management. Follow the basics—ease off, build strength with strengthening exercises, and give your body time to adapt.
🛠️ Recovery toolkit: If you’re building back during the transition phase, we’ve designed support to help. Our shock-absorbing gel insoles reduce impact forces at the foot. Our overpronation insoles control excessive foot motion if you overpronate. Our adjustable shin compression brace reduces strain on your shinbone while you stay active.
Used together, they address shin splints from multiple angles—reducing peak forces at ground level, controlling foot mechanics, and supporting your calf during recovery.
If your pain is severe, worsening, or not responding to self-management after two weeks, see a physiotherapist or GP. They can rule out stress fractures or other conditions, assess your biomechanics, and give you a personalised rehab plan.
You’ll get back to running.