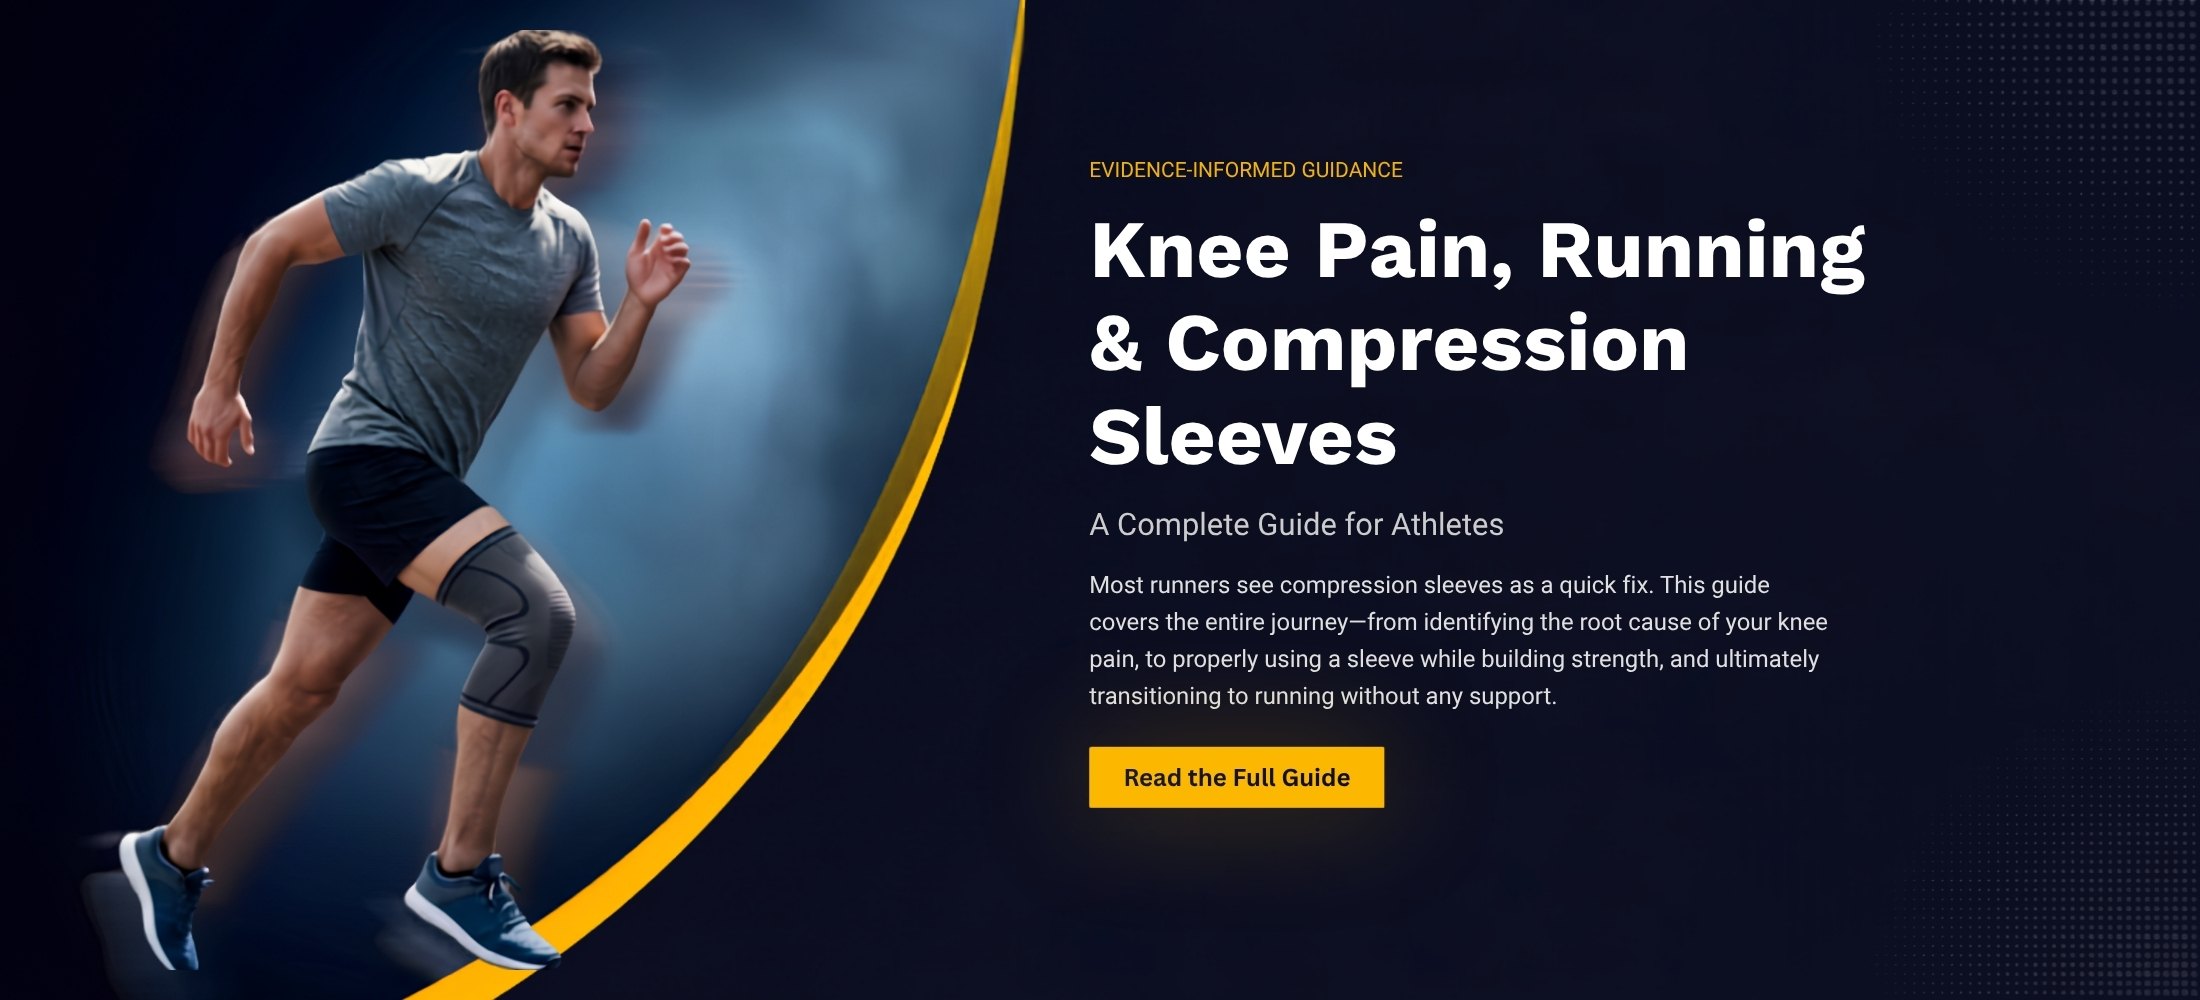
Knee Pain, Running, and Compression Sleeves: What Actually Works
Why Your Compression Sleeve Isn’t Fixing Your Knee Pain (And What Will)
You bought the sleeve. You wore it on every run. The pain eased just enough to keep going. Three months later, you’re still wearing it—and the pain’s back.
Here’s why: the sleeve was never meant to fix the problem. It was meant to manage symptoms while you fixed what’s actually wrong.
This guide shows you how to use a sleeve correctly while you build the strength that makes it unnecessary.
The sleeve reduces pain and improves stability—but only if you’re also fixing what’s actually wrong.
When to See a GP, When to See a Physio, and When It’s Urgent
Not all knee pain needs a sleeve. Some needs a GP or A&E immediately.
When to see a professional:
See a GP or A&E immediately if you have:
- Sudden sharp pain with immediate swelling
- A popping sound when the injury happened
- Inability to put weight on your leg
- Swelling that won’t go down after three days
- A catching or locking sensation (feels like something is stuck)
- Your knee gives out or buckles repeatedly
These signs mean structural damage—torn ligaments, meniscus damage, fractures, or severe cartilage problems. A compression sleeve won’t help. It might dull the pain enough to delay proper treatment, and that can make the injury worse.
For mild pain that came on gradually (pain level 2–4 out of 10):
You can’t point to a specific moment when you hurt it—it just started aching over time? See a physiotherapist. They’ll watch you walk and run, test your strength and flexibility, then tell you which muscles are causing the problem. Then they’ll design a strengthening programme targeting the specific muscles that are weak or tight.
If you already have a diagnosis and know the cause is muscular or related to form, start with a physiotherapist. If you’re unsure, start with the GP. Significant cartilage and tendon damage won’t heal on their own—don’t wait months hoping it’ll go away.
If external support (sleeves, straps, braces) hasn’t helped after four weeks of consistent use and strength work, physiotherapy is essential. A physiotherapist will assess your specific movement patterns and design exercises that target what’s actually causing your pain. A consistent strength programme, three times per week, will often make external support unnecessary within two to three months.
What Causes It
Most knee pain in runners comes down to poor running form and muscle imbalances. Here’s the “why” behind the pain.
Running Form: Why Your Knee Takes the Hit
Most runners land with their foot too far ahead of their body—this is called overstriding.
Overstriding means your foot hits the ground well in front of your hip. Your leg is straight. Your heel takes the full impact, and that force shoots straight up through your knee. Do this thousands of times per run, and micro-damage—tiny tears in muscle fibres and tendons that are too small to feel individually—builds up.
Why this causes pain:
How many steps you take per minute affects where your foot lands.
Most runners with knee pain take 150–165 steps per minute. That’s too slow. Fewer steps mean each stride gets longer, which means your foot lands further ahead of your body. Aim for 170–180 steps per minute instead. More steps = shorter strides = your foot lands closer to your hip. This increases the braking force—the force that slows you down when your foot hits the ground. Your knee has to absorb both the vertical impact force (from gravity and your body weight) and the horizontal braking force. The combination creates a peak force that can be 2–3 times your body weight with each step.
To find your current rate, count how many times your right foot hits the ground in 30 seconds and multiply by four.
Landing under your hip distributes the load across your ankle, calf, and thigh—your knee doesn’t take it all.
Posture:
Many runners lean back slightly or stay too upright. This encourages your foot to land ahead of you. A slight forward lean from your ankles (not your waist) shifts your weight forward so your foot lands under you.
Muscle Imbalances: Why Your Knee Compensates
Your lower body works as a kinetic chain—when one part moves wrong, everything above and below it pays the price. For example: when your foot rolls inward, your shinbone rotates inward with it, which forces your thigh bone to rotate inward, which pulls your kneecap off-centre. One movement at the bottom creates problems all the way up.
Weak muscles force your knee to take the strain. These imbalances create the conditions for all four common knee injuries.
Why Weak Glutes Cause Knee Pain
When your foot is on the ground bearing your full body weight, your glutes should hold your thigh steady and keep it aligned. If they’re weak, your thigh rotates inward with every step, twisting your knee.
Weak glutes can’t control your thigh bone when your foot is on the ground bearing your full weight. Without that control, your thigh bone rotates inward. Your thigh bone rotating inward pulls your kneecap with it, forcing it to track outward in its groove. That off-centre tracking creates uneven pressure on the cartilage behind your kneecap.
Your knee collapses slightly inward each time you land. That’s what happens when your glutes aren’t strong enough to hold it steady. After repeated friction over multiple runs, the structures inside your knee—cartilage, tendons, ligaments—get irritated. That’s the kinetic chain at work—weak glutes at the hip cause problems at the knee. This inward rotation is what’s causing most runner’s knee cases.
Why Tight Quads Pull Your Kneecap Off-Centre
Your quadriceps (the muscles at the front of your thigh) attach directly to the top of your kneecap through a tendon. Tight quads pull your kneecap upward and slightly outward, forcing it to track incorrectly in its groove.
Your kneecap gets pulled slightly off-centre with every step, creating friction between the back of your kneecap and the groove it sits in. After hundreds of repetitions, this causes inflammation and pain.
Why Weak Hamstrings Overload Your Patellar Tendon
Your hamstrings (the muscles at the back of your thigh) control your leg’s forward swing just before your foot hits the ground. They lengthen under tension to slow down your lower leg, preventing your knee from snapping into full extension. Weak hamstrings mean your quads have to work harder to control that motion, which pulls even more on your kneecap. Hamstrings also work with your glutes to extend your hip when you push off the ground. Weak hamstrings mean your quads compensate for that too, creating chronic overload on the patellar tendon.
This is common in runners who log 20+ miles per week but do no strength work. Running builds quad endurance but doesn’t strengthen hamstrings at the same rate because the quads do most of the work when you push off, while hamstrings are only active when your leg swings forward. Running alone doesn’t build the strength you need to prevent overuse injuries.
A compression sleeve can help manage the pain while you fix these imbalances—but only if you understand what it does and what it doesn’t do. Before we get to that, you need to know which type of knee pain you have.
What’s Actually Wrong With Your Knee
Now that you know why knee pain happens in runners, here are the four most common conditions and how to tell them apart.
The Four Types of Knee Pain Runners Get
Overuse, poor form, and sudden jumps in mileage are the main causes. The four most common conditions:
Runner’s knee:
A dull ache behind or around your kneecap, especially when running downhill or after sitting for 30 minutes or more. Your kneecap sits in a groove at the front of your thigh bone. When it glides smoothly up and down in that groove, you don’t get pain. When your quadriceps are tight or your glutes are weak, they pull your kneecap off-centre—usually outward and upward. That off-centre tracking creates uneven pressure on the cartilage behind your kneecap. After hundreds of repetitions, that uneven pressure causes inflammation and pain.
The medical name for runner’s knee is patellofemoral pain syndrome.
IT band syndrome:
Sharp pain on the outside of your knee the moment your foot lands. The IT band is a thick strip of tissue running from your hip to just below your knee. When the IT band becomes tight, it loses flexibility and rubs against a bony knob on the outside of your thigh bone, just above your knee joint. This friction happens at the exact moment your foot strikes the ground and your knee is bent at about 30 degrees. After thousands of repetitions, a small fluid-filled sac beneath the IT band becomes inflamed.
Patellar tendinitis:
Pain at the front of your knee, just below the kneecap, when you push off or climb stairs. This is inflammation of the patellar tendon—the thick cord of tissue that connects the bottom of your kneecap to the top of your shinbone. Runners develop this when they increase mileage or intensity too quickly, or when weak quads force the patellar tendon to absorb excessive load when you push off the ground. Repeated overload causes micro-tears in the tendon fibres, which triggers inflammation.
Bursitis:
Swelling in the small fluid-filled sacs that cushion your knee joint. Runners most commonly develop bursitis in front of the kneecap (prepatellar bursitis) or on the inside of the knee, just below the joint (pes anserine bursitis). Prepatellar bursitis develops from repetitive friction when your kneecap rubs against surrounding tissue—often from kneeling or direct impact. Pes anserine bursitis develops when tight hamstrings pull repeatedly on their insertion point—the spot where three hamstring tendons attach to the inside of your shinbone, just below your knee. That repeated pulling irritates the bursa beneath the tendons. You’ll notice puffiness around your kneecap (prepatellar) or tenderness on the inside of your knee below the joint line (pes anserine).
Behind all of these: weak hips and glutes, tight quads or hamstrings, and knees taking the strain for muscles that aren’t pulling their weight. Here’s how it usually happens: a runner increases their weekly mileage from 20 to 30 miles, or adds a fourth running day without adjusting recovery time. Micro-damage builds up over the next few runs, and pain appears within a few weeks.
How to Tell Them Apart
Where it hurts and when it hurts tell you which condition you have.
Use this pain scale while you heal:
- 0 = no pain
- 1–2 = mild discomfort (noticeable but doesn’t limit movement)
- 3–4 = moderate pain (limits some movements)
- 5–6 = significant pain (changes how you move)
- 7–8 = severe pain (difficult to continue activity)
- 9–10 = extreme pain (cannot continue)
Runner’s knee aches dully behind or around your kneecap. Worse when you run downhill, walk down stairs, or stand up after sitting for 30 minutes or more. You might also hear a grinding or clicking sound when you bend your knee.
IT band syndrome hits the outside of your knee—not the front, not the back—the moment your foot lands. Often starts a few miles into your run and gets progressively worse. Typically disappears within a few minutes of stopping, then comes right back when you start again.
Patellar tendinitis hurts at the front of your knee, in a very specific spot just below your kneecap. Press your finger there. If it’s tender, that’s your patellar tendon. Sharpest when you push off to start running or when you climb stairs.
If you can’t pinpoint which one, or if you have pain in multiple locations, see a physiotherapist. Guessing wrong and treating the wrong thing can make it worse—for example, stretching an already overstretched IT band or strengthening muscles that are already overworking.
Building Strength
Now you know what’s wrong and when to see a professional. The real fix is building the strength that protects your knee in the first place.
A compression sleeve helps you manage symptoms while you recover, but the real fix is building the strength that protects your knee in the first place. Without strength work, most runners experience recurring pain within three to six months.
Most runners notice less pain and better stability within two weeks—but only if they do all three sessions each week.
These exercises fix the imbalances we covered earlier: they strengthen your glutes so your knee stops collapsing inward, balance your quads and hamstrings, and rebuild the stability your knee needs.
How to Approach This Routine
Understanding how these exercises work:
You’ll work your muscles in two ways: lifting (shortening the muscle, called concentric) and lowering (lengthening the muscle under tension, called eccentric). The lowering phase is especially important for tendon health—it helps rebuild tendon tissue and strengthen the tendon’s ability to absorb force.
If you’re new to strength training:
Start with bodyweight versions of these exercises and focus on learning proper form for the first week. Do just one set of each exercise. After one week of bodyweight practice, add resistance (dumbbells, resistance bands, or ankle weights) and build to three sets.
How to progress:
After one week of bodyweight practice, add resistance. Start with a weight that makes the last 2–3 reps of each set challenging but not impossible. When you can complete all three sets with good form, increase the weight by 5–10% (e.g., from 10 lbs to 11–12 lbs). Progress every 1–2 weeks.
Why rest days matter:
Your muscles actually get stronger on rest days. During exercise, you create micro-damage in muscle fibres. During rest, you repair that damage and build the fibres back slightly stronger. Without rest, you accumulate damage faster than you can repair it, which leads to overtraining and injury.
When to stop an exercise:
If any exercise causes sharp pain (4+ out of 10) or pain that lingers after you finish, skip that exercise and check in with a physiotherapist. Mild discomfort (1–2 out of 10) during the exercise is normal—that’s your muscles working. But pain that changes your form or makes you limp afterward is a red flag.
The Strength Routine
Do this routine three times per week, with at least one rest day between sessions. Here are the six exercises:
1. Single-Leg Glute Bridges
3 sets of 12 reps each side
Lie on your back, knees bent, feet flat on the ground hip-width apart. Your heels should be about 12 inches from your buttocks. Lift one foot off the ground and extend that leg straight out.
Push through the heel of your grounded foot to lift your hips toward the ceiling, squeezing your glute at the top. Form a straight line from your shoulders to the knee of your extended leg. Lower back down. Repeat on the other side.
This works each glute on its own.
2. Side-Lying Leg Raises
3 sets of 12 reps each side
Lie on your side with your legs stacked and straight. Rest your head on your lower arm. Keeping your top leg straight and your toes pointing forward (not toward the ceiling), lift that leg about 12 inches above your bottom leg, then lower it back down.
This strengthens the muscles on the outside of your hip—the ones that stop your thigh from rotating inward when you run.
3. Hamstring Curls
3 sets of 12 reps each leg
If you have access to a gym, use the hamstring curl machine. If you’re at home, lie face-down and loop a resistance band around one ankle, anchoring the other end to a sturdy table leg. Bend your knee to pull your heel toward your glutes, then slowly straighten.
This strengthens your hamstrings and takes pressure off your kneecap.
4. Single-Leg Deadlifts
3 sets of 12 reps each side
Stand on your right leg with your knee slightly bent. Hold a dumbbell in your left hand (start with 5–10 lbs). Lean forward from your hips, lowering the dumbbell toward the ground while your left leg extends straight behind you for balance. Keep your back straight.
Lower until your torso is nearly horizontal—roughly parallel to the ground—then squeeze your right glute to stand back up. This builds single-leg stability and strengthens your glute and hamstring.
5. Step-Ups
3 sets of 10 reps each side
Stand facing a box, bench, or step that’s 12–18 inches high and won’t shift when you step on it. Place your right foot fully on the step. Push through your right heel to lift your body up onto the step, bringing your left foot up to meet it.
Step back down with your left foot first, then your right. Your top leg should do all the work, not your bottom foot.
6. Planks
3 sets of 45 seconds
Start on your hands and knees. Place your forearms on the ground, elbows directly under your shoulders. Step your feet back so your body forms a straight line from your head to your heels.
Pull your stomach muscles in tight—like you’re bracing for impact. Don’t let your hips drop lower than your shoulders or lift too high. Hold this position for 45 seconds. If you can’t hold for 45 seconds, drop to your knees and hold from there.
Strong core muscles brace your torso and pelvis, preventing your hips from dropping to one side or rotating excessively when your foot hits the ground—which keeps your knee aligned and reduces strain.
Progression Milestones: What to Expect Week by Week
Here’s when you should expect to progress, so you know you’re on track:
Week 1–2: Foundation Phase
Bodyweight only, focus on form. Do just one set of each exercise if you’re new to strength training. By the end of Week 2, you should be able to complete all three sets with good form.
Week 3–4: Load Phase
Add light resistance (5–10 lbs dumbbells, light resistance band, or ankle weights). The last 2–3 reps of each set should feel challenging but not impossible. You should notice less knee pain during easy runs.
Week 5–6: Build Phase
Increase resistance by 5–10% (e.g., from 10 lbs to 11–12 lbs). You should be able to run without the sleeve on easy days by the end of Week 6.
Week 7–8: Strength Phase
Increase resistance again, or add a fourth set to each exercise. By the end of Week 8, you should have no pain (0–1 out of 10) on most runs.
Week 9+: Maintenance Phase
Maintain strength with 2 sessions per week (down from 3). Continue this indefinitely to prevent the pain from returning.
What if I’m not progressing on schedule?
If you’re still at Week 3–4 resistance levels by Week 7, or if pain hasn’t improved after 6 weeks of consistent strength work (three sessions per week, every week), see a physiotherapist. You may have a structural issue that needs assessment, or your form may need correction.
Form Corrections
Strength work fixes the muscle imbalances. Now let’s fix how you actually run.
Increase your step rate:
Count how many times your right foot hits the ground in 30 seconds, then multiply by four. That’s your current step rate. If it’s below 170, aim to increase it by 5% each week. Use a metronome app set to your target rate and match your steps to the beat. This feels awkward at first—your stride will feel choppy and short—but after two to three runs it becomes natural.
Land under your hip:
Film yourself running from the side (a friend can hold a phone, or prop it on a wall). Pause the video at the moment your foot hits the ground. Draw an imaginary vertical line from your hip straight down. Your foot should land on or just slightly ahead of that line. If it’s landing well ahead, you’re overstriding (as explained earlier). Shorten your stride by increasing your step rate.
Lean slightly forward:
Stand tall, then lean forward from your ankles (not your waist) until you feel like you’re about to tip forward. That’s the angle you want while running. Your body should form a straight line from your head to your ankles, tilted slightly forward. This shifts your centre of mass forward so your foot lands under you instead of ahead of you.
Practice these corrections during your easy runs first. Once they feel natural, they’ll carry over to your harder efforts.
What a Compression Sleeve Actually Does
A compression sleeve helps while you fix the real problem—it’s not the fix itself. Here’s what it does, what it doesn’t do, and the risks of relying on it.
What a Sleeve Does
A compression sleeve improves proprioception—your knee’s ability to sense its own position and movement. This helps you maintain better control and stability while running.
When you run, thousands of tiny sensors in your muscles, tendons, and joint capsule send signals to your brain about where your knee is and how it’s moving. These sensors include:
- Muscle spindles (which sense stretch)
- Tendon sensors (which sense tension)
- Joint receptors (which sense position and movement)
When you’re injured or fatigued, inflammation and swelling weaken these signals. Fluid buildup physically stretches the tissue, and inflammatory chemicals interfere with nerve transmission—so the signals become weaker and less accurate. The gentle pressure from a sleeve activates these receptors more strongly, amplifying the signals and helping your brain control your knee better.
The sleeve also reduces excessive soft tissue vibration—the bouncing and jiggling of your muscles and tendons with each foot strike. Each impact creates oscillations in your soft tissue. In healthy tissue, these oscillations are small and well-damped. In inflamed or fatigued tissue, the oscillations are larger and last longer. These repeated oscillations create micro-strain in already-damaged tendon fibres and irritate the inflamed lining of your joint. Compression reduces these oscillations by applying external pressure that holds the tissue more firmly in place, limiting how much it can bounce and jiggle with each impact.
The sleeve also improves circulation by increasing venous return—the flow of blood back to your heart. Compression squeezes your veins, which pushes deoxygenated blood and waste like lactic acid back toward your heart more efficiently. This makes it easier for fresh, oxygenated blood to reach the area. The net effect is improved circulation, which helps push waste out of your muscles and back toward your heart (where it’s filtered and processed) and delivers amino acids (for rebuilding muscle fibres), glucose (for energy), and white blood cells (which clear debris and fight infection).
Can a Sleeve Prevent Injury?
The sleeve reduces injury risk if you have mild instability or a history of knee trouble, but don’t rely on it to protect you from training errors or poor form. If you feel like you need the sleeve on every run, you haven’t fixed the real problem.
What It Doesn’t Do
That’s what a sleeve can do. But it has clear limits:
- It won’t hold your knee in place like a brace with metal hinges
- Structural damage like torn ligaments or meniscus tears won’t heal with a sleeve alone
- Weak muscles won’t get stronger from wearing a sleeve
- Poor running form won’t improve just because you’re wearing support
Only strength work fixes these imbalances.
The Real Risk: Masking Pain
The sleeve can dull the pain enough that you ignore micro-tears or inflammation building beneath the surface. A common scenario: pain dulls just enough to keep running, the runner adds mileage because they feel “better,” then three weeks later it’s a stress reaction or tendon damage that needs months to heal.
Pain signals tissue damage—inflammation, micro-tears, or excessive strain. The sleeve can dull that signal, but it doesn’t fix the weak muscles or poor form causing the tissue damage.
Before every run, ask yourself: if I took the sleeve off right now, would I still feel ready to run at my normal pace without discomfort?
If the answer is no, you’re not ready for that mileage.
How to Use a Compression Sleeve Correctly
Here’s how to choose, fit, and use a sleeve correctly—and how to gradually stop needing it.
Choosing and Fitting Your Sleeve
Choosing the Right Sleeve for Your Injury
Not all sleeves are the same. The type you choose depends on what’s causing your pain.
Basic compression sleeve:
A simple tube of elastic fabric that slides over your knee. Provides even compression around the entire joint. Fine for general swelling, mild runner’s knee, or preventive support. This is where most runners should start.
Sleeve with patellar pad or ring:
Looks like a basic sleeve but has a silicone or gel donut-shaped pad that sits around your kneecap. The pad centres your kneecap and keeps it tracking properly in its groove. Best for runner’s knee. When you put it on, the hole in the pad should frame your kneecap exactly—not sitting above it or below it.
Sleeve with side strap:
Has an additional strap that wraps around the outside of your knee, just above the joint line. Takes pressure off the IT band where it crosses the outside of your knee. Best for IT band syndrome. The strap should sit about an inch above the bony point you can feel on the outside of your knee.
Open-front sleeve with patellar strap:
The front of the sleeve is open (it wraps around from the sides), and it includes a separate strap that sits just below your kneecap. This design relieves pressure on the patellar tendon. Best for patellar tendinitis. The strap should sit in the soft spot just below your kneecap, not on the bone.
If you’re not sure which type you need—or if you’re still not certain which condition you have—start with a basic compression sleeve. If it doesn’t help after two weeks, check in with a physiotherapist.
When a Sleeve Isn’t Enough
If you’ve been wearing a sleeve consistently for four weeks, doing the strength work, and your pain hasn’t improved—or if it’s getting worse—try these alternatives:
Patellar strap:
A small band (about 1 inch wide) worn just below your kneecap. It changes the angle at which your patellar tendon pulls on your shinbone, reducing stress on the tendon. Effective specifically for patellar tendinitis when a full sleeve isn’t enough. Wear it snug but not tight—you should still be able to slide a finger underneath.
Hinged knee brace:
A brace with metal or plastic supports on the sides that prevent your knee from bending sideways. Provides much more stability than a sleeve. Useful if your knee feels unstable, has a history of giving out, or if you’re recovering from a ligament injury. These are bulkier and restrict movement slightly, so they’re not ideal for long-term use—but they can bridge the gap while you build strength.
Kinesiology tape:
Elastic therapeutic tape applied directly to your skin in specific patterns to support muscles and reduce strain. The tape lifts your skin slightly, which increases space between your skin and the tissue beneath it. This reduces pressure on pain receptors and improves lymphatic drainage—the flow of fluid that carries waste away from inflamed tissue. Some runners prefer this to a sleeve because it’s less bulky, allows more natural movement, and can be worn for 3–5 days continuously (even in the shower). Best for runner’s knee or patellar tendinitis when you want support without the bulk of a full sleeve. Applying it incorrectly can reduce its effectiveness or pull on your skin uncomfortably—if you’re not sure how to apply it, have a physiotherapist show you the first time.
Getting the Fit Right
Measuring for size:
Most brands use thigh circumference measured 4 inches (10 cm) above the centre of your kneecap. Wrap a soft measuring tape around your thigh at that point. Snug, but not tight. Check the brand’s size chart. If you’re between sizes, go with the smaller size for firmer support (but less comfortable), the larger size for more comfort (but slightly less compression).
How tight should it feel:
You should feel firm, even pressure all around your knee—snug but not uncomfortable. You should be able to slide two fingers between the sleeve and your skin, but with some resistance. If the sleeve slides down easily when you bend your knee, it’s too loose. If you still see deep marks in your skin after 20 minutes, it’s too tight.
Warning signs the sleeve is too tight:
- Numbness or tingling in your lower leg or foot
- Cold toes or foot feels like it’s “falling asleep”
- Skin discolouration (pale, blue, or purple)
- Pain that gets worse, not better
- Visible swelling below the sleeve (fluid is being trapped)
If you notice any of these, take the sleeve off immediately. You need a smaller size.
Positioning the Sleeve
Pull the sleeve up over your foot and calf until it reaches your knee. Centre it so your kneecap sits in the middle of the sleeve, with the top edge on your lower thigh and the bottom edge on your upper calf. Smooth out any wrinkles or bunched fabric—they create pressure points that can irritate your skin or underlying tissue during repetitive movement.
If your sleeve has a patellar pad, gel ring, or alignment guide, position it directly over your kneecap. Look down—you should see your kneecap centred in the pad or opening. If it’s off to one side, rotate the sleeve until it’s aligned.
When you bend your knee to a right angle (90 degrees), the sleeve should stay put without slipping. If it rolls down or bunches up behind your knee, it’s either too loose or the wrong size.
When and How Long to Wear It
When to Wear It (and When Not To)
Wearing the sleeve every day keeps your body from learning to stabilise itself naturally. Runners who’ve worn one for months often discover their glutes weren’t firing at all. The sleeve did the work their muscles should have done.
If you always wear the sleeve, the muscles that support your knee never experience the stress they need to get stronger. Your nervous system adapts by reducing muscle activation—essentially, your body lets the sleeve do the work instead of your muscles. You end up dependent on the sleeve.
When to wear it:
- Runs where you have mild discomfort (pain level 2–3 out of 10)
- Long runs where fatigue might cause your form to break down
- During the first two weeks of returning from injury
- Hard efforts (faster-paced runs, speed work, or hills) while you’re rebuilding strength
When not to wear it:
- Easy runs where you have no pain (0–1 out of 10)
- Strength training sessions (your muscles need to work without assistance)
- Cross-training (cycling, swimming, elliptical)
- Any run where you feel completely pain-free without it
How Long to Wear It After Running
Wear the sleeve for one to two hours after your run—longer if you notice swelling, shorter if you have no pain (0–1 out of 10). The compression continues to improve circulation and reduces inflammation in the first hour or two after exercise, when your muscles are most inflamed.
Wearing it longer doesn’t provide additional benefit because the primary anti-inflammatory effect happens in the first two hours after exercise. Normal blood flow delivers amino acids (for rebuilding muscle fibres), glucose (for energy), and white blood cells (which clear debris and fight infection) so you repair damaged muscle fibres, repair micro-tears in tendons, and clear inflammatory chemicals.
If swelling lasts more than two hours after you finish running, that’s a sign you’re running more than your body can currently handle. Cut back on mileage or intensity instead of keeping the sleeve on longer.
Important: do not sleep in a compression sleeve. During sleep, your heart rate drops and blood flow to your extremities naturally decreases. Adding compression on top of that can restrict circulation. Wear the sleeve only during activity and for one to two hours after.
The Phased Approach: Week by Week
Once you understand when and how long to wear the sleeve, here’s how to gradually stop needing it. This plan reduces your reliance on the sleeve week by week. This assumes you’re also building strength and fixing your form.
Weeks 1–2: Recovery Phase
Wear the sleeve on every run while rebuilding strength.
Wear the sleeve on every run while you rebuild strength and address form issues. Keep your runs short and easy—no more than 60–70% of what you were running before you got injured, and at a pace slow enough that you could chat without gasping for breath. Focus on strength exercises three times per week. Cycling, swimming, or elliptical work keeps your fitness up without the impact.
Week 3: Transition Phase
Alternate sleeve-on and sleeve-free runs.
Wear the sleeve only on alternate runs. On sleeve-free runs, pay close attention to how your knee feels. Use the pain scale from earlier: 0–1 is pain-free, 2–3 is mild discomfort, 4+ means you’re not ready yet. If pain returns at the same intensity as before (5+ out of 10), drop back to wearing it every time for another week. If you have only mild discomfort (2–3 out of 10) or no pain (0–1 out of 10), continue with the alternating schedule. Keep mileage steady—don’t increase yet.
Week 4: Testing Phase
Wear the sleeve only on long runs or hard efforts.
Wear the sleeve only on your longest run of the week or hard efforts (faster-paced runs, speed work, hills). All easy runs should be sleeve-free. If you can complete three consecutive easy runs without the sleeve and have no pain during or after (0–1 out of 10), move to the final phase. If not, spend another week here.
Week 5+: Independence Phase
Run without the sleeve.
Run without the sleeve. Keep it in your running kit for the first month as a backup—if pain suddenly jumps to 3+ out of 10 mid-run, you can put it on. But the goal is to not need it.
If pain returns at any phase:
Drop back one phase and spend another week there. Inflammation fluctuates based on activity load, sleep, and stress. Some weeks you’ll feel almost back to normal, others you’ll have setbacks. Runners with mild strains often progress in four weeks; those with moderate tendinitis or significant muscle weakness may need eight. Progress based on pain levels, not arbitrary timelines. Dropping back one phase now is better than pushing through and needing months off later for a stress fracture or chronic tendinitis.
Supporting Your Recovery
You now know how to use the sleeve correctly. But remember: strength work is what actually fixes the problem. Everything else—warm-ups, drills, surfaces—just makes the fix happen faster.
Before Running: A 5-Minute Warm-Up
Cold muscles and tendons are stiffer and less able to absorb impact. A proper warm-up increases tissue temperature and elasticity, reducing your risk of strain when you start running.
1. Dynamic Leg Swings
30 seconds each leg
Stand next to a wall or post for balance. Swing one leg forward and back in a controlled motion, like a pendulum. Start with small swings and gradually increase the range as your hip loosens. Stand tall.
15–20 swings each side.
2. Walking Lunges
10 reps each leg
Stand tall, then step forward with your right foot into a lunge position. Lower your back knee toward the ground until both knees are bent at roughly 90 degrees. Your front knee should sit directly over your ankle.
Push through your right heel to stand up, then step your left foot forward into the next lunge. Keep walking forward, switching legs with each step.
3. Glute Bridges
15 reps
Lie on your back on a mat or soft surface. Bend your knees and place your feet flat on the ground, hip-width apart. Your heels should be about 12 inches from your buttocks. Rest your arms by your sides.
Push through your heels to lift your hips toward the ceiling, squeezing your glutes hard at the top. Keep your body straight from shoulders to knees. Hold at the top for one second, then lower back down.
4. Brisk Walking
2 minutes
Walk at a pace that’s faster than casual but not quite jogging. This gradually raises your heart rate and increases blood flow to your legs.
Total time: 5 minutes.
Running Drills to Improve Form
Warm-ups prepare your body. These drills improve how you run.
These drills train coordination and motor patterns—they’re not replacements for strength work. They train your body to land softly, increase your step rate, and engage your glutes. After a few weeks of consistent drill work, your regular running feels lighter and easier because you’re landing with better form and using your glutes more efficiently.
Add them after your warm-up, two to three times per week. Do each drill for 30 seconds, rest for 30 seconds, then repeat once more.
High knees:
Run in place, lifting your knees up toward your chest with each step. Land on the balls of your feet, not your heels. This trains you to lift your knees and increases your step rate.
Butt kicks:
Run in place, flicking your heels up toward your glutes with each step. Keep your knees pointing down—don’t let them drift forward. This activates your hamstrings and trains your nervous system to cycle your legs faster.
Skipping:
Skip forward, lifting one knee up while pushing off the opposite foot. Lift your knee to hip height and swing your arms from waist to shoulder level. This builds power and coordination.
Straight-leg bounds:
Run forward with exaggerated strides, keeping your legs nearly straight and landing on the balls of your feet. This is an advanced drill—it creates high impact forces—so skip it if you have knee pain above 2 out of 10. It trains you to use your glutes and hamstrings to propel yourself forward instead of relying on your quads.
After Running: A 5-Minute Cool-Down
Your cool-down brings your heart rate down gradually and stops your muscles from tightening up overnight.
1. Gentle Walking
2 minutes
Don’t stop abruptly after your last running step. Walk slowly for two minutes to let your heart rate come down gradually and help push waste like lactic acid out of your muscles and back toward your heart.
2. Static Stretching
30 seconds each side, each muscle group
Now that your muscles are warm, hold each stretch without bouncing. Bouncing causes micro-tears in warm muscle fibres. Move into each stretch slowly until you feel gentle tension, then hold for 30 seconds before switching sides.
Quads:
Stand on your left leg (hold a wall or post for balance if needed). Bend your right knee and pull your right heel toward your right glute with your right hand. Keep both knees level—don’t let your bent knee drift forward or out to the side. Keep your hips even and keep your standing knee slightly bent.
Hamstrings:
Place your right heel on a low step, curb, or bench (6–12 inches high). Keep that leg straight (don’t lock your knee, just straighten it). Lean forward from your hips—not your waist—keeping your back straight. Reach your hands toward your right shin or foot.
Calves:
Step your right foot back about two feet behind your left foot. Press your right heel firmly into the ground and keep that leg straight. Bend your left (front) knee slightly and lean your hips forward.
3. Foam Rolling
2 minutes
Sit on the ground with a foam roller under your right thigh. Support your weight with your hands on the ground behind you. Slowly roll from just above your knee to just below your hip, moving about one inch per second.
Roll over the muscle (quads on the front, IT band on the outside), not directly over your knee joint or bones. If you hit a tender spot, pause for 10 seconds and breathe. This releases tension in tight fascia—the thin layer of connective tissue that wraps around your muscles.
Do 60 seconds on each leg.
That’s it—5 minutes.
Training Choices That Protect Your Knees
Warm-ups, cool-downs, and drills help you recover faster and run with better form while your muscles get stronger. But three bigger training decisions—what you do when you’re not running, where you run, and what you wear—affect how much stress your knees absorb in the first place.
Training Surface: What Works Best for Your Knees
Where you run changes how much impact your knees take with every step.
Concrete:
The hardest surface. Pavements, city streets, and car parks don’t cushion anything. All the impact goes straight into your joints.
Asphalt:
Slightly softer than concrete. Roads are usually asphalt. Still firm, but slightly easier on your knees than concrete.
Packed dirt or gravel trails:
The best option for shock absorption. These trails cushion each step. The downside: uneven ground often irritates the sides of your knees if you have IT band issues, because your foot lands at a different angle with every step—unlike flat pavement, where every landing is consistent—which changes the tension on the IT band repeatedly.
Treadmills:
Consistent cushioning with every step. The belt has some give, which reduces impact by roughly 15–20% compared to concrete. Great during recovery because you can control pace and incline precisely without worrying about terrain, and the consistent surface means your knee experiences the same force with every step—no surprises. Use treadmills when you’re in the early phases of returning from injury (weeks 1–4) and need predictable, controlled conditions. Once you’re pain-free, mix in outdoor runs to rebuild your body’s ability to adapt to varied terrain.
Roads with a sideways slope:
Avoid these. Roads sloped sideways for drainage create an uneven surface—one foot lands lower than the other. This drops one hip and puts uneven stress on your IT band and knee. If you must run on sloped roads, switch sides every 10 minutes by crossing to the other side of the road (when safe) so you’re not always tilted the same direction.
Recommendation: Switching to trails even once a week often reduces knee soreness because the softer surface absorbs more impact than pavement. If you have access to trails, use them for at least one easy run per week during recovery.
But even the best surface won’t protect you if your shoes are worn out or wrong for your foot type.
Shoes and Orthotics
When to replace your shoes:
Every 300–500 miles. The cushioning inside breaks down and stops working long before the bottom looks worn out. If you run 20 miles per week, that’s roughly every 4–6 months. Write the date you started using them on the tongue or inside the heel so you know when to replace them.
How to tell if your shoes are causing problems:
If your knee pain started within a few weeks of getting new shoes, or if it gets worse in one pair and better in another, your shoes might be the issue. Try rotating between two different pairs for a week—if pain improves in one pair, that’s your answer.
Choosing the right type:
If your foot rolls inward too much when you run—called overpronation—choose stability shoes. When your foot rolls inward, your shinbone rotates inward with it. This inward rotation travels up the kinetic chain, forcing your thigh bone to rotate inward as well. This pulls your kneecap outward in its groove, creating the same uneven pressure that causes runner’s knee. Stability shoes have firmer foam on the inner edge to resist that inward roll, which reduces the rotational force traveling up to your knee.
If you have normal arches and your foot doesn’t roll inward much, standard cushioned shoes work fine. These cushion your foot evenly—no extra support on either side.
Orthotics:
These are inserts that go inside your shoe to correct how your foot moves. A podiatrist or physiotherapist makes custom orthotics specifically for your feet. Over-the-counter orthotics (like Superfeet or Powerstep) work for many runners and cost much less.
Orthotics work by correcting how your foot moves, which changes the forces that travel up through your knee. Controlling how your foot rolls changes how your shinbone rotates, which changes the angle at which forces travel up through your knee.
How to know if you need them:
Get your running form checked. A physiotherapist or running shop specialist will video you running on a treadmill, then play it back in slow motion. The specialist will look for: excessive pronation (foot rolling inward more than 15 degrees), supination (foot rolling outward), early heel lift (heel coming off the ground too soon), or asymmetry (one foot moving differently than the other). They’ll also check whether your knee collapses inward or bows outward when your foot hits the ground. If they see excessive pronation combined with inward knee collapse, orthotics will likely help. If your foot mechanics are normal but your knee still collapses inward, the problem is hip/glute weakness, not your feet—orthotics won’t help.
Returning to Running
Now that you understand how to support your recovery with cross-training, surfaces, and shoes, here’s how to actually return to running.
Cross-Training While You Heal
Cycling, swimming, and elliptical training keep your fitness up without the pounding. Cross-train two to three times a week during recovery.
For all three, go at a pace where you could chat without gasping for breath. This pace lets you heal without losing fitness.
Cycling:
Low-impact and keeps your legs moving through a similar range of motion. Start with flat routes (hills increase knee strain) and resistance set to 3–4 out of 10 on the bike’s resistance scale. If you feel knee pain when you push down on the pedal, raise your seat slightly—a seat that’s too low forces your knee into a sharper bend and increases pressure on your kneecap.
Start with 20–30 minutes, three times per week.
Swimming:
Zero impact. Freestyle and backstroke are best. Avoid breaststroke if you have knee pain—the frog-kick motion aggravates runner’s knee and patellar tendinitis.
Start with 20–30 minutes, two to three times per week.
Elliptical:
Feels like running but without the pounding. Keep resistance at 3–5 out of 10 and avoid using the incline feature (which increases knee flexion and strain) until you have no pain (0–1 out of 10).
Start with 20–30 minutes, three times per week.
How to progress: After two weeks pain-free, add 5 minutes per session or increase resistance by one level. For swimming, you can also incorporate short intervals (30 seconds faster, 90 seconds easy).
The Walk-Run Plan
When you’re ready to return:
Only start running again when you can do all three of these:
- You can walk for 30 minutes without pain (0 out of 10)
- You have no visible swelling around your knee
- You can do a single-leg squat on the injured side without pain or your knee collapsing inward
Start with a walk-run plan:
Run for one minute at an easy pace—slow enough that you could chat without gasping for breath—then walk for three minutes. Repeat this cycle five times for a total of 20 minutes. Do this three times in the first week (e.g., Monday, Wednesday, Friday), with at least one full rest day or cross-training day (cycling, swimming, elliptical) in between each run.
Build up slowly:
Increase your running time by no more than 10% each week—this prevents you from adding load faster than your tissues can adapt. For example, if you run 20 minutes total this week, add no more than 2 minutes next week (20 × 0.10 = 2).
Here’s how the first eight weeks look. Each week builds on the last, gradually shifting the balance from walking to running:
Week 1: Run for 1 minute, walk for 3 minutes. Repeat 5 times. Total session: 20 minutes (5 minutes running, 15 minutes walking).
Week 2: Run for 2 minutes, walk for 3 minutes. Repeat 4 times. Total session: 20 minutes (8 minutes running, 12 minutes walking).
Week 3: Run for 3 minutes, walk for 2 minutes. Repeat 4 times. Total session: 20 minutes (12 minutes running, 8 minutes walking).
Week 4: Run for 5 minutes, walk for 2 minutes. Repeat 3 times. Total session: 21 minutes (15 minutes running, 6 minutes walking).
Week 5: Run for 8 minutes, walk for 2 minutes. Repeat 2 times. Total session: 20 minutes (16 minutes running, 4 minutes walking).
Week 6: Run for 10 minutes, walk for 2 minutes. Repeat 2 times. Total session: 24 minutes (20 minutes running, 4 minutes walking).
Week 7: Run for 15 minutes, walk for 2 minutes, then run for 10 minutes. Total session: 27 minutes (25 minutes running, 2 minutes walking).
Week 8: Run continuously for 30 minutes without walking breaks.
Wear the sleeve for the first two weeks, then slowly drop it following the phased approach we covered earlier. If pain comes back at any point (3+ out of 10), drop back one week in the plan and check in with a physiotherapist.
Troubleshooting: What If Things Don’t Go to Plan?
What if pain comes back every time I progress?
Drop back two weeks instead of one, and spend two weeks at each level before progressing. Your tissues need more time to adapt. For example, if pain returns in Week 4, drop back to Week 2 and stay there for two weeks before moving to Week 3. Also check your strength work—are you doing all three sessions per week? If you’re skipping sessions, your muscles aren’t getting stronger fast enough to support the increased running load.
What if I plateau and can’t progress past a certain week?
Check your strength work first—are you doing all three sessions per week with proper form and progressive resistance? If yes, and you’ve been stuck at the same week for three consecutive weeks with no improvement, see a physiotherapist. You may have a structural issue that needs assessment, such as a meniscus tear, cartilage damage, or ligament laxity that won’t improve with strength work alone.
What if I feel ready to progress faster than the plan?
Don’t. Tissue adaptation takes time. Feeling ready doesn’t mean your tendons and cartilage are ready. Your cardiovascular system and muscles recover faster than your connective tissue (tendons, ligaments, cartilage). You might feel strong and pain-free, but your tendons are still rebuilding collagen fibres and your cartilage is still adapting to increased load. Stick to the 10% rule. Skipping ahead now often leads to setbacks that cost you weeks or months later.
What does full healing look like?
Full healing means you can run your pre-injury distance, at your normal pace, on varied terrain, without any sleeve or support, and feel no pain during or after the run (0–1 out of 10).
You should also have no swelling, no clicking or catching, no fear of re-injury, and no compensating (limping, favouring one leg, shortening your stride on one side).
Three consecutive pain-free runs without the sleeve is a good sign you can progress, but full healing means you can run your pre-injury distance and intensity without pain. For most intermediate runners, that’s around five miles per run.
That usually takes four to eight weeks, depending on how severe your injury was and how consistently you do the strength work.
Your Next Steps
A compression sleeve is a valuable tool when used with a plan—but it won’t fix what’s actually causing your pain. The real fix is building the strength and movement patterns that protect your knee in the first place.
Here’s your action plan for this week:
Monday, Wednesday, Friday: Do the full strength routine (all six exercises, 3 sets each). Takes 25–30 minutes. Jump to strength routine
Tuesday, Thursday, Saturday: Easy walk or cross-training (cycling, swimming, elliptical). 20–30 minutes.
Sunday: Full rest day.
Before your next run: Do the 5-minute warm-up (leg swings, lunges, glute bridges, brisk walk). Jump to warm-up
After your next run: Do the 5-minute cool-down (walk, stretch, foam roll). Jump to cool-down
Track your pain level (0–10) after each run. If it’s 3+, you’re not ready to increase mileage yet.
Start with the strength routine this week. Do it three times. Notice how your knee feels on your next run. That’s the difference between managing symptoms and fixing the problem.
The sleeve is a tool. Strength is the solution.
Disclaimer
This guide provides general information about knee pain, compression sleeves, and strength training for runners. It is not a substitute for professional medical advice, diagnosis, or treatment.
Individual circumstances vary. Always consult a physiotherapist or GP for personalised assessment and treatment, especially if you have existing knee problems, a history of injury, or any medical conditions that affect your joints or movement.