
")

")
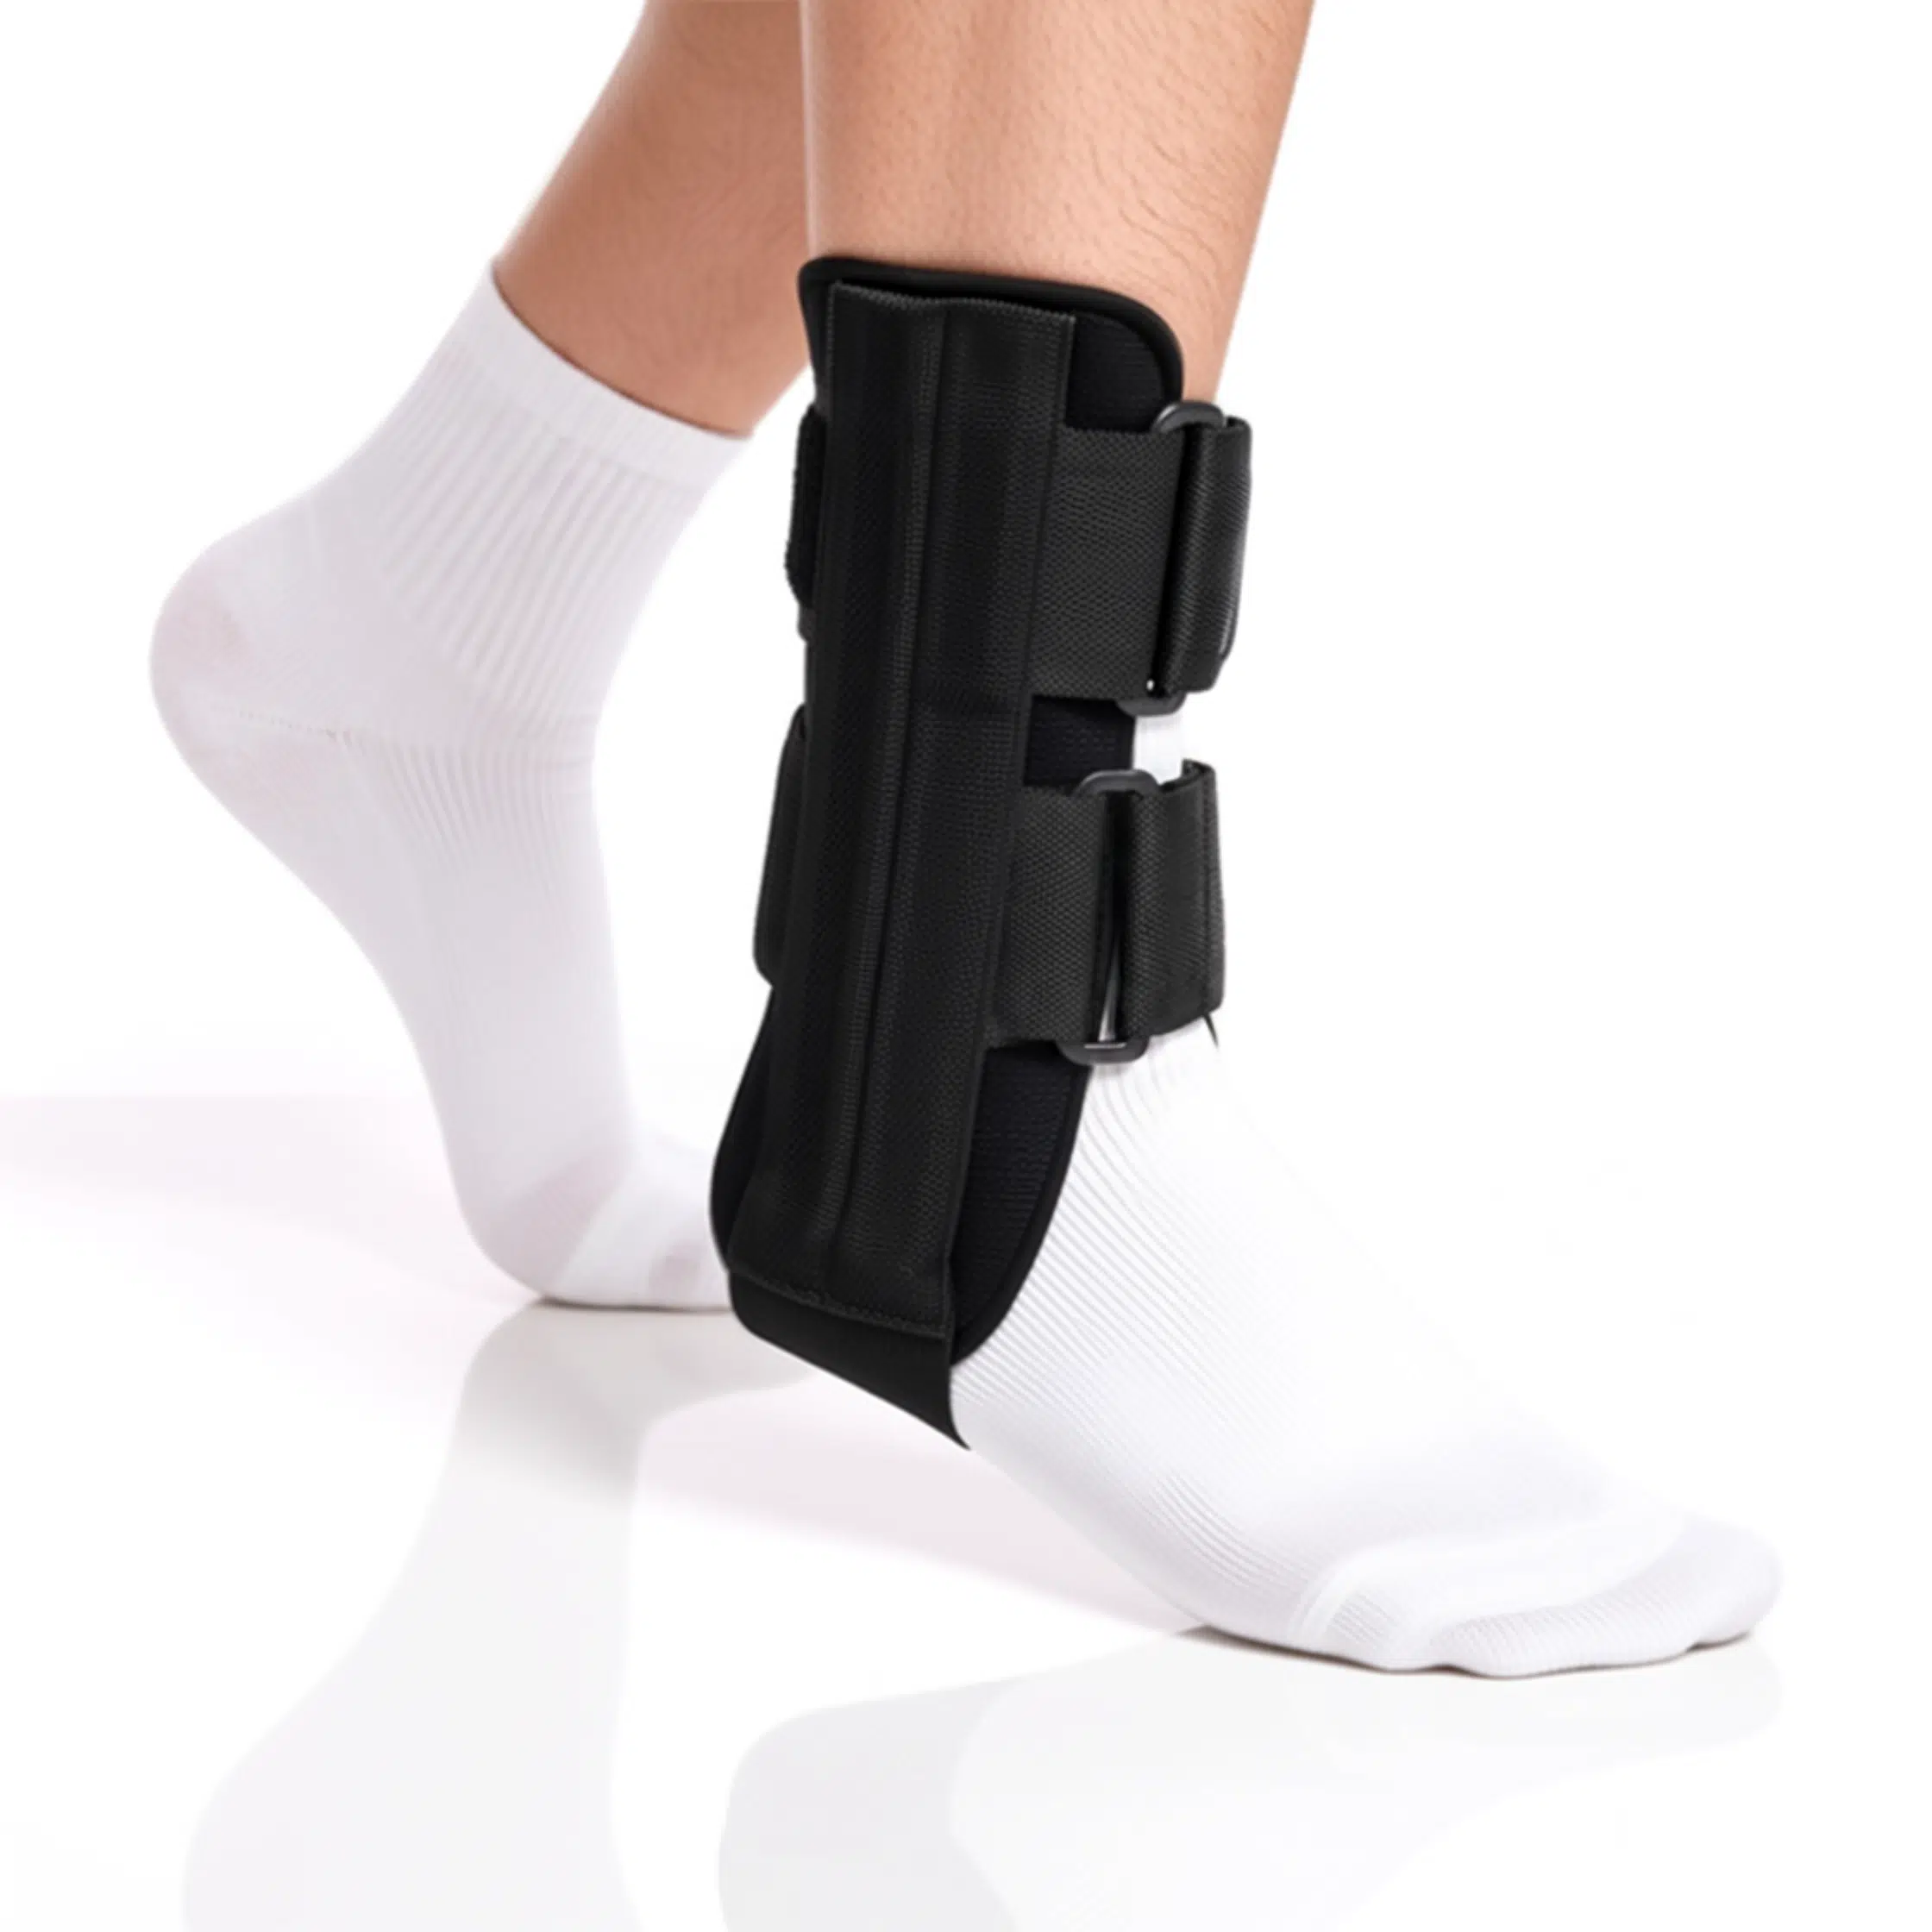
Ankle Stabilizer Splint
£12.49inc VAT
- FootReviver™ Rigid Ankle Brace – A rigid ankle splint with adjustable compression and side-to-side stability for recovery from sprains, fractures, chronic instability, and Achilles problems—designed to protect healing tissues while you rebuild strength
- Three sizes (UK shoe size): Small 3–5, Medium 5–8, Large 8–11; fits either left or right ankle
- Two rigid metal splints built into fabric side panels sit on the inner and outer sides of your ankle and stop it rolling inward or outward—the movement that causes most injuries and instability
- Two adjustable elastic straps wrap around your lower leg and ankle area (the “ankle tube” above your heel), crossing over the back (Achilles region) and fastening at the front with buckles and hook-and-loop closures for quick, secure fit and easy compression adjustment
- Cushioned heel pad absorbs impact with every step and provides a stable base with slight lift that supports and guides your heel position without significantly raising your foot inside your shoe
- Adjustable compression helps manage swelling throughout the day and across your recovery timeline—tighter in early stages for acute swelling, lighter as you heal—while improving proprioceptive feedback (your brain’s sense of where your ankle is and how it’s moving)
- Padded interior around ankle bones with moisture-wicking, breathable fabric reduces friction and keeps skin comfortable during extended wear
- Low-profile, shoe-friendly design fits inside roomier lace-up shoes, trainers, or boots without excessive bulk; won’t fit in very tight shoes, slip-ons, or shoes with rigid ankle collars
- Quick on/off with wide openings and adjustable straps—easy to remove during rest periods and rehabilitation exercises, then reapply for activity
- Supports recovery and symptom management for:
- Acute injuries: ankle sprains (Grade 1–2), once cleared to bear weight with flexible support
- Chronic conditions: chronic ankle instability (recurrent giving-way episodes), Achilles tendinopathy, posterior tibial tendon dysfunction (PTTD)
- Post-immobilisation: recovery from ankle fractures or surgery, once transitioned out of cast or boot and cleared for flexible support
- Other conditions: ankle arthritis, peroneal tendinopathy, sinus tarsi syndrome, high ankle sprains (discuss with your physio first)
- Not suitable for: unstable fractures, severe ligament ruptures requiring rigid immobilisation, active infection, open wounds, or severe circulation problems—check with your medical team if unsure
- Works best alongside exercises that rebuild your ankle’s natural strength and control—the splint protects healing tissues and manages symptoms during activity, while exercises address the underlying problem
- Selective use recommended: wear during higher-risk activities (walking on uneven ground, stairs, sport) and remove during rest periods and rehabilitation exercises to maintain your ankle’s natural function
- Important safety warnings: Blood clot risk after ankle injuries—seek urgent medical attention if you develop calf pain, warmth, swelling, and redness, or sudden shortness of breath and chest pain. If toes go numb, tingly, pale, blue, or purple, loosen the splint immediately. Only use once cleared to bear weight with flexible support—not suitable if you’ve been told your ankle needs rigid immobilisation
- Simple care: hand-wash in warm water with mild detergent, air-dry completely; no tumble dry or direct heat
- 30-day money-back guarantee—return for full refund if not suitable, provided it’s in clean, original condition
Get 15% off - When bought together with:

- This item: Ankle Stabilizer Splint(£12.49inc VAT)
- Calf Support Compression Sleeves(£9.99inc VAT)
FootReviver Rigid Ankle Brace: Support for Sprains, Instability & Recovery
A rigid ankle splint with adjustable compression and side-to-side stability for recovery from sprains, fractures, chronic instability, and Achilles problems—designed to protect healing tissues while you rebuild strength.
⚠️ Important Safety Information
Read before use: This splint is not suitable if you’ve been told your ankle needs rigid immobilisation in a cast or boot, or if you have an unstable fracture, severe ligament rupture, active infection, open wounds, or severe circulation problems. Only use once your medical team has cleared you to bear weight with flexible support.
Blood clot warning: Ankle injuries increase your risk of blood clots. If you develop calf pain, warmth, swelling, and redness, or sudden shortness of breath and chest pain, seek urgent medical attention immediately. This splint does not prevent or treat blood clots.
Circulation check: If your toes go numb, tingly, pale, blue, or purple, the splint is too tight—loosen it immediately. See full Safety Guidance section below for complete warnings.
Is This Right for You?
This splint is designed for people who need side-to-side ankle stability during recovery or activity. It’s most helpful if you’re dealing with:
- A recent ankle sprain (once you’ve been cleared to bear weight and start moving)
- Chronic ankle instability—your ankle gives way on uneven ground, stairs, or during sport
- Recovery from an ankle fracture or surgery (once you’re out of the cast or boot and cleared for flexible support)
- Achilles tendinopathy, posterior tibial tendon dysfunction, or other conditions where compression and stability help manage symptoms during activity
It’s not suitable if you’ve been told your ankle needs complete immobilisation, if you have an unstable fracture or severe ligament rupture requiring rest, or if you have active infection, open wounds, or severe circulation problems around your ankle.
If you’re unsure whether this splint is appropriate for your situation, check with your GP, physiotherapist, or orthopaedic specialist before purchasing.
How It Works
TL;DR: Two rigid metal splints built into fabric side panels sit on either side of your ankle and stop it rolling inward or outward—the movement that causes most injuries and instability. Adjustable compression around your lower leg and ankle manages swelling and improves your sense of ankle position. A cushioned heel pad absorbs impact and provides a stable base with slight lift. You wear it inside roomier shoes during activities that challenge your ankle, and remove it during rest and rehabilitation exercises.
Three core mechanisms
1. Side-to-side stability (the main job)
The two rigid metal splints are built into fabric panels that sit on the inner and outer sides of your ankle. When your ankle starts to roll—whether inward (the most common sprain mechanism) or outward—the rigid splints catch the movement and stop it before it becomes a full roll or giving-way episode. This is mechanical support: the splints physically block the movement that damages ligaments or causes your ankle to give way.
The splints are permanently built into the side panels and cannot be removed. This fixed construction ensures consistent, reliable support throughout your recovery and activity use.
This matters most during the vulnerable phases of recovery—when your ligaments are healing but not yet strong, or when you’re rebuilding muscle strength and coordination after weeks in a cast or boot. It also matters for people with chronic instability, where the ligaments are permanently loose and can’t hold the ankle firmly on their own.
2. Compression and swelling control
Two adjustable elastic straps wrap around your lower leg and ankle area, fastening at the front with buckles and hook-and-loop closures. These straps sit one above the other on your lower leg—roughly where you’d describe as the “ankle tube” area—and cross over the back of your ankle (the Achilles region) before securing at the front. They don’t run under your heel or around your foot itself; they encircle the lower leg and upper ankle, pulling the rigid side panels in to secure the brace firmly to your leg.
You control how snug the fit is, which means you can adapt the compression throughout the day and across your recovery timeline. Tighter compression in the early stages helps manage acute swelling by gently squeezing excess fluid out of the tissues and back into your circulation. As swelling reduces and your ankle stabilises, you can adjust to a lighter, more comfortable level of compression that still provides support without feeling restrictive.
Compression does two things. First, it helps manage swelling. Swelling is a normal part of healing, but too much swelling slows recovery, increases stiffness, and makes movement uncomfortable. Second, compression improves proprioception—your brain’s sense of where your ankle is and how it’s moving. When fabric is in contact with your skin and applying gentle pressure, the nerve endings in your skin send clearer signals to your brain about your ankle’s position. This can reduce the feeling of uncertainty or instability and improve your confidence during activities that would otherwise feel risky.
3. Proprioceptive feedback and confidence
When you injure your ankle—or when you’ve been immobilised in a cast or boot for weeks—your proprioceptive system becomes impaired. The nerve endings that detect position and movement are damaged or have lost their calibration. Your brain doesn’t know exactly where your ankle is, and your muscles can’t react fast enough to correct small tilts or wobbles before they become full rolls.
The splint’s compression and contact around your ankle provide external sensory input that partially compensates for this impaired proprioception. Your brain gets clearer feedback about your ankle’s position, which can improve your sense of control and reduce the anxiety that often comes with ankle injuries—the constant worry that your ankle might give way at any moment.
Additional features
The cushioned heel pad sits under your heel and serves two purposes. It absorbs some of the impact forces when your heel strikes the ground during walking, which reduces the repetitive loading on healing tissues with every step. It also provides a stable base for the side splints to work from, with a slight lift that supports and guides your heel position without significantly raising your foot inside your shoe. The lift is subtle—more about cushioning and support than adding meaningful height—but it helps maintain proper heel alignment during weight-bearing.
The splint is designed to fit inside roomier lace-up shoes, trainers, or boots. It won’t fit comfortably inside very tight shoes, slip-ons, or shoes with rigid ankle collars. The lightweight, slim design means it doesn’t add excessive bulk, though you’ll notice some width around the sides of your ankle where the rigid panels sit. Most people wear it over a thin sock to reduce friction and absorb moisture.
What the splint doesn’t do
The splint doesn’t heal your injury or fix the underlying problem. Ligaments heal through rest, protection, and gradual loading. Muscles strengthen through exercises. Proprioception improves through balance training. The splint is a supportive tool that protects healing tissues, manages symptoms, and gives you the confidence to stay active during recovery—but the exercises and rehabilitation work are what actually rebuild your ankle’s strength and function.
The splint also doesn’t prevent all ankle movements. You can still point your toes down and pull them up (the movements needed for walking, stairs, and most daily activities). It specifically limits side-to-side rolling movements—the ones that cause injury and instability.
Important principle for all conditions below
For rehabilitation exercises designed to rebuild your ankle’s natural strength and control, you should remove the splint. Your muscles and nervous system need to learn to control the ankle independently, without relying on external support. If you always wear the splint during exercises, your muscles won’t develop the strength and coordination needed to protect your ankle once you stop using the splint. Your physiotherapist will guide you on when to wear the splint during activity and when to remove it during exercises.
Who This Helps: Conditions and Recovery Scenarios
The splint provides the most benefit for conditions where side-to-side stability, compression, or proprioceptive feedback address the underlying problem or help manage symptoms during recovery. Let’s look at each condition in detail—what it is, what it actually feels like day-to-day, how the splint helps, and what realistic recovery looks like.
Ankle Sprains (Acute Lateral Ankle Sprains)
What happens when you sprain your ankle
An ankle sprain is a stretch or tear of the ligaments on the outside of your ankle—usually the anterior talofibular ligament, the most commonly injured ligament in the body. It typically happens when your foot rolls inward while your body weight is on it: stepping off a kerb awkwardly, landing badly from a jump, or catching your foot on uneven ground.
The severity ranges from Grade 1 (mild stretch with microscopic tears, ligament still intact) through Grade 2 (partial tear, some ligament fibres torn but not completely ruptured) to Grade 3 (complete rupture, ligament torn all the way through). Most ankle sprains are Grade 1 or 2.
In the first 24–72 hours, your ankle swells, bruises, and becomes painful to move or bear weight on. The swelling is your body’s inflammatory response—blood vessels dilate and leak fluid into the tissues to bring healing cells to the area. The pain is partly from the torn ligament itself and partly from the pressure of the swelling on surrounding nerves.
What this actually feels like
The moment it happens, you feel a sharp, tearing pain on the outside of your ankle. You might hear or feel a pop. Your ankle gives way underneath you and you stumble or fall. Within minutes, it starts to swell. Within hours, the swelling is obvious—your ankle looks puffy and feels tight and hot. Bruising appears over the next day or two, spreading down into your foot.
Walking is painful and difficult. You limp heavily, trying to keep weight off the injured side. Putting your foot flat on the ground hurts. Pointing your toes or turning your foot inward is excruciating. At night, the throbbing keeps you awake. First thing in the morning, your ankle is stiff and sore—those first few steps are slow and careful.
Over the first week, the acute pain gradually eases, but your ankle still feels vulnerable and unstable. You’re cautious with every step, worried about rolling it again. Uneven ground, stairs, and slopes feel risky. You avoid activities that challenge your ankle.
How the splint helps during sprain recovery
Once you’ve been cleared to start bearing weight and moving (usually within the first few days for Grade 1–2 sprains), the splint protects the healing ligament from re-injury while you gradually increase your activity level. The rigid side splints stop your ankle rolling inward—the movement that caused the original injury and the movement that would re-tear the healing ligament if it happened again.
The adjustable compression helps manage swelling, which is often still significant in the first 2–4 weeks. Less swelling means less stiffness, better range of motion, and faster return to normal walking. The proprioceptive feedback helps you feel more confident and stable during activities that would otherwise feel risky—like walking on uneven ground or going down stairs.
Realistic expectations, timeline, and when to get checked
Most Grade 1–2 ankle sprains heal well with conservative treatment: rest and protection in the first few days, then gradual return to weight-bearing and movement, combined with exercises to restore range of motion, strength, and balance. The splint is part of this conservative approach—it protects the healing ligament during the vulnerable early weeks while you’re rebuilding strength and control.
Typical timeline: Week 1—acute pain and swelling, limited weight-bearing, focus on rest and ice. Week 2–3—swelling reducing, walking more comfortably with the splint, starting gentle range-of-motion exercises. Week 4–6—walking confidently, starting strengthening and balance exercises, reducing splint use during easier activities. Week 6–12—returning to sport and higher-impact activities, wearing the splint only during these challenging activities or not at all if strength and confidence have returned fully.
Grade 3 sprains (complete rupture) take longer—often 8–12 weeks or more—and some require surgical repair if the ligament has torn completely away from the bone.
Get medical advice if: you cannot bear weight at all even after a few days, pain is getting worse rather than gradually improving, swelling is increasing or not reducing after the first week, your ankle feels very unstable or keeps giving way despite wearing the splint, or you’re not seeing steady improvement week by week. These might indicate a more severe injury (such as a fracture, high ankle sprain, or complete ligament rupture) that needs further assessment. See Safety Guidance section for full list of when to seek assessment.
Week-by-week recovery guide for ankle sprains
Week 1 (acute phase): Your ankle is swollen, painful, and difficult to bear weight on. Follow POLICE principles: Protection (avoid movements that stress the healing ligament), Optimal Loading (bear weight as tolerated—some weight-bearing is beneficial for healing, but don’t push into severe pain), Ice (15–20 minutes every few hours to manage swelling and pain), Compression (wear the splint during any weight-bearing to protect the ligament and manage swelling), Elevation (prop your foot up above heart level when resting to help fluid drain away). Start gentle range-of-motion exercises: draw the alphabet with your toes, gently point and flex your foot within a comfortable range. Remove the splint for these exercises.
Week 2–3 (early mobilisation): Swelling is reducing, and you’re walking more comfortably. Wear the splint during all weight-bearing activities—walking, standing, stairs, household tasks. You should be able to walk without limping by the end of week 3, though your ankle may still feel stiff and slightly sore. Continue range-of-motion exercises and start gentle strengthening: resistance band exercises (push your foot against the band in all directions and hold for 5–10 seconds), calf raises holding onto a surface for support. Elevate your foot regularly throughout the day if swelling increases.
Week 4–6 (progressive loading): You’re walking confidently and starting to increase your activity level. Continue wearing the splint during longer walks, stairs, uneven ground, or any activity that challenges your ankle. You can start reducing splint use during short walks on flat, even surfaces if your ankle feels stable. Progress your exercises: single-leg balance (stand on the injured leg for 30 seconds, repeat 3 times, twice a day), single-leg calf raises, resistance band exercises with more resistance. Your physiotherapist may introduce sport-specific exercises if you’re returning to sport.
Week 6–12 (return to activity): Most people can return to sport and higher-impact activities during this phase, though the exact timing depends on your progress and the demands of your sport. Wear the splint during sport and exercise initially, then reduce to wearing it only during particularly challenging activities (such as playing on uneven ground or during competitive matches) as your confidence improves. Some people don’t need the splint at all by 12 weeks if their strength and balance have returned fully. Continue balance and strengthening exercises 2–3 times per week even after you’ve returned to normal activities—this reduces your risk of re-injury.
Chronic Ankle Instability
What this actually feels like day-to-day
Your ankle gives way on uneven ground, stairs, sometimes for no obvious reason. You’re constantly watching where you step. Uneven pavements that other people cross without thinking make you tense up. Grass, gravel, cobblestones—anything that’s not flat and smooth—feels risky. Stairs feel more dangerous going down than up. You grip the rail, test each step before committing your weight.
You have moments where your ankle starts to roll and you catch it just in time: your heart jumps, you might gasp or grab for support, but you don’t actually fall. These near-misses happen multiple times a week, sometimes multiple times a day. Or you have full giving-way episodes where your ankle rolls completely, you stumble or fall, and you’re left with a sharp jolt of pain and immediate swelling that takes a few days to settle.
Between episodes, your ankle might feel completely fine, or it might feel vaguely unstable—like it’s not quite solid underneath you, like you’re walking on a joint that might betray you at any moment. Many people start avoiding activities they used to enjoy—hiking, running, dancing, playing with their children—and that’s hard. It’s not just physical; it affects your confidence and your life.
What it is
Chronic ankle instability typically develops after one or more ankle sprains that didn’t heal properly or weren’t rehabilitated adequately. When a ligament tears, it heals by forming scar tissue—which is less elastic and less organized than the original ligament. If the scar tissue forms while the ligament is in a stretched position (because you didn’t protect it during healing), it stays permanently loose. At the same time, the nerve endings that were torn during the original injury may not regenerate fully, leaving you with less accurate position sense. Your brain doesn’t know exactly where your ankle is, and your muscles can’t react fast enough to stop it rolling.
The result is an ankle that feels unreliable. The ligaments are too loose to hold the joint firmly, and the proprioceptive system that normally detects and corrects small tilts and wobbles before they become full rolls isn’t working accurately. You’re left with an ankle that gives way unpredictably, often with little warning.
How the splint helps
The rigid side splints catch your ankle when it starts to roll, stopping the movement before it becomes a full giving-way episode. This is particularly helpful on uneven ground, stairs, or during sport, where the risk of missteps is higher. The external support compensates for the loose ligaments, giving you the stability your own tissues can’t provide. The compression and contact around your ankle also improve proprioceptive feedback—your brain gets clearer signals about your ankle’s position, which can reduce the feeling of uncertainty and improve your confidence during activities that would otherwise feel risky.
Realistic expectations and when to get checked
Chronic instability is a long-term condition. The ligaments are permanently stretched, and no amount of exercise or bracing will tighten them back to their original length. But you can significantly improve stability and reduce giving-way episodes by strengthening the muscles that control your ankle and retraining your proprioceptive system through balance exercises. Strong muscles can compensate for loose ligaments by actively holding the joint in position, and improved proprioception means your muscles react faster when your ankle starts to tilt.
Most people with chronic instability use the splint selectively—wearing it during higher-risk activities like walking on uneven ground, sport, or during flare-ups when their ankle feels particularly unstable—and removing it during lower-risk activities like short walks on flat, even surfaces. This selective use maintains your ankle’s natural function and strength during easier activities, while providing protection and confidence during activities that challenge your ankle more.
You’ll need to commit to ongoing strengthening and balance exercises—typically 2–3 times per week, even after your initial rehabilitation phase is complete—to maintain the muscle strength and coordination that protect your ankle from further episodes.
Get medical advice if: you’ve been doing exercises consistently for 3–6 months, wearing the splint during higher-risk activities, and your ankle still gives way frequently—particularly during normal walking or low-demand activities. Surgery typically involves reconstructing the damaged ligaments using tissue grafts, which can restore stability that exercises and bracing can’t achieve. Recovery takes 3–6 months, and you’ll still need rehabilitation exercises afterwards, but for people with severe laxity or recurrent giving-way despite good rehabilitation, surgery can be the difference between avoiding activities you love and getting back to them confidently. See Safety Guidance section for full list of when to seek assessment.
Managing chronic instability long-term
Selective use strategy: You don’t need to wear the splint all day every day. Most people with chronic instability wear it during high-risk activities—walking on uneven ground, stairs, sport or exercise, or during prolonged standing—and remove it during lower-risk activities such as short walks on flat, even surfaces, or when sitting or resting. This selective approach maintains your ankle’s natural function and strength during easier activities, while providing protection and confidence during activities that challenge your ankle more.
Flare-up management: Chronic instability often has periods where symptoms flare up—more frequent episodes of giving way, increased anxiety about your ankle, or mild swelling after activity. Flare-ups are often triggered by doing too much activity, changing your activity pattern suddenly (like going on a long walk after weeks of being sedentary), or external factors such as fatigue or stress.
When symptoms flare up (and they probably will at some point), increase how often you wear the splint. You might wear it during all weight-bearing activities for a few days or weeks until the flare-up settles, then reduce back to selective use once symptoms improve. Identify what triggered the flare-up and adjust your activity level or management strategies accordingly.
Activity modification: This means adjusting what you do, how much you do, and how you do it to avoid aggravating your symptoms. Strategies include: reducing how far or how long you walk each day, avoiding high-impact activities like running or jumping until your ankle is stronger, choosing flat, even surfaces instead of uneven ground or slopes when possible, taking regular breaks during prolonged standing, switching temporarily to lower-impact exercise like swimming or cycling instead of running, and pacing yourself—spreading activities throughout the day rather than doing everything at once. (This principle applies to several conditions below—we’ll reference back to this explanation rather than repeating it.)
Seasonal considerations: Many people with chronic ankle instability need more support during winter months, when icy pavements, wet leaves, and slippery conditions increase the risk of slips or episodes of giving way. You may also need more support during busy periods when you’re on your feet more than usual—such as during work events, travel, or family occasions. Plan ahead and have the splint available during these higher-risk periods.
Long-term exercise commitment: The splint manages symptoms and provides external support, but it doesn’t fix the underlying problem—the ligaments are still loose, and your proprioception is still impaired. To maintain stability and function long-term, you need to commit to ongoing strengthening and balance exercises—typically 2–3 times per week, even after your initial rehabilitation phase is complete. These exercises maintain the muscle strength and coordination that protect your ankle from further episodes. If you stop doing exercises, your muscles will weaken again and giving-way episodes will become more frequent.
Common problems: Episodes still happening despite wearing the splint—check the splint is fastened snugly (not loose), and consider whether you need to progress your exercises to more challenging variations. The splint provides external stability, but it can’t compensate for very weak muscles. Anxiety about your ankle even when wearing the splint—your ankle has let you down before, so of course you’re wary. Gradually expose yourself to slightly challenging surfaces (like grass or gentle slopes) while wearing the splint, and build confidence that the splint will catch you if your ankle starts to roll. Feeling dependent on the splint—if you’re wearing it all day every day and feel like you can’t function without it, work with a physiotherapist to gradually reduce use during easier activities while building your strength and confidence through exercises.
Achilles Tendinopathy
What it is
The Achilles tendon—the thick, rope-like tendon that connects your calf muscles to your heel bone—becomes painful, stiff, and sometimes swollen. The tendon transmits the force from your calf muscles to your heel bone, allowing you to push off the ground when you walk, run, or jump. It’s one of the strongest tendons in your body, but it’s also one of the most commonly injured, particularly in people who do running, jumping, or other high-impact activities.
When the tendon is overloaded—usually due to a sudden increase in activity, repetitive high-impact activities, or age-related changes in the tendon’s structure—the collagen fibres inside the tendon start to break down faster than your body can repair them. Small tears accumulate, the tendon’s internal structure becomes disorganized, and the tendon thickens and becomes painful as your body tries (and fails) to heal the damage while you keep loading it. The tendon may feel tender to touch, particularly in a specific spot a few centimetres above your heel bone (mid-portion Achilles tendinopathy) or right where the tendon attaches to the heel bone (insertional Achilles tendinopathy).
What this actually feels like
The hallmark symptom is pain and stiffness first thing in the morning. Those first few steps out of bed are excruciating—a sharp, burning pain in the back of your ankle that makes you limp heavily. As you move around and the tendon warms up, the pain eases and you can walk more normally. This warm-up effect is characteristic of tendinopathy.
The pain often returns after you’ve been sitting for a while—getting up from your desk or out of the car brings that same sharp stiffness. During activity, you might feel a dull ache or tightness in the tendon, particularly when pushing off the ground or going up stairs or hills. After activity, the tendon might feel sore and stiff, and you might notice swelling or thickening in the painful area. If you press on the tendon, there’s usually a tender spot that makes you wince.
How the splint helps
The cushioned heel pad absorbs some of the impact forces when your heel strikes the ground during walking. This reduces the repetitive loading on the Achilles tendon with every step, which can make walking less painful during flare-ups or in the early stages of rehabilitation. The slight lift provided by the heel pad can also reduce the stretch on the Achilles tendon during the stance phase of walking, which may ease symptoms. The compression around your ankle may help manage any swelling in the tissues around the tendon.
Mind you, the splint’s main benefit for Achilles tendinopathy is symptom management during activities—it doesn’t heal the tendon or address the underlying problem.
Realistic expectations and when to get checked
Achilles tendinopathy heals and strengthens through appropriate exercise and load management, not through rest or external support alone. The most effective treatment is a structured exercise programme—typically eccentric strengthening exercises, where you slowly lower your heel down from a raised position. This loads the tendon in a controlled way that stimulates healing and remodelling of the damaged collagen fibres. These exercises are often uncomfortable while you’re doing them, but over weeks and months they rebuild the tendon’s capacity to handle load.
The splint is a symptom-management tool that makes walking and daily activities more comfortable while you’re doing your exercises. Most people wear it during flare-ups or during prolonged walking, and remove it during rest periods and exercise sessions.
Recovery from Achilles tendinopathy typically takes 3–6 months of consistent exercise, and some cases take longer.
Get medical advice if: your pain is getting progressively worse despite rest and activity modification, you have sudden, severe pain in the tendon (which might indicate a partial or complete rupture), you can’t bear weight or push up onto your toes on the affected side, the tendon is hot, red, and very swollen (which might indicate infection or inflammatory conditions rather than tendinopathy), or you’re not seeing any improvement after 3–6 months of consistent eccentric exercises. If you’re not seeing improvement after 3–6 months of structured exercises, discuss with a physiotherapist or sports medicine specialist whether you need additional treatments such as shockwave therapy, injections, or in rare cases, surgery to remove damaged tissue. See Safety Guidance section for full list of when to seek assessment.
Using the splint alongside Achilles tendon exercises
Wear the splint during daily activities: Use the splint during walking, standing, or other daily activities that aggravate your symptoms. The cushioned heel pad and slight lift reduce the impact and stretch on the tendon with every step, which can make walking less painful during flare-ups. This allows you to stay active and maintain your fitness while your exercises are doing the work of healing the tendon. (Remember: exercises should be done with the splint removed, as explained in the How It Works section.)
Typical exercise progression: In weeks 1–2, start with double-leg eccentric calf raises (lower down on both legs rather than one leg only) if single-leg lowers are too painful. Do 3 sets of 15 repetitions, twice a day. Expect discomfort during the exercises—up to 5 out of 10 on a pain scale is acceptable, but sharp, severe pain means you’re doing too much.
By weeks 3–6, progress to single-leg eccentric calf raises. The exercises should start to feel easier, and your morning pain should gradually reduce.
Around weeks 6–12, add load by holding weights or wearing a backpack, and start introducing more dynamic activities like walking on hills or gentle jogging if your symptoms allow. Most people see significant improvement by 12 weeks, though some cases take longer.
Common problems: Pain during exercises is too severe—reduce the load by doing double-leg lowers instead of single-leg, or reduce the range of motion (don’t lower your heel as far down). Morning pain isn’t improving after 4–6 weeks of exercises—check you’re doing the exercises correctly and consistently (twice a day, every day). If you’re only doing them occasionally, you won’t see improvement. Pain is getting worse despite doing exercises correctly—you might be overloading the tendon with too much activity outside of your exercise sessions. Reduce your walking, running, or other high-impact activities and focus on the exercises only for a few weeks.
Posterior Tibial Tendon Dysfunction (PTTD)
What it is
The posterior tibial tendon runs from a muscle deep in your calf, down behind the bony prominence on the inside of your ankle, and attaches to several bones in the middle of your foot. When you contract the muscle, the tendon pulls on these bones and lifts your arch up. It also helps control the inward and outward rolling of your heel when you walk. It’s one of the main structures that supports your arch.
When this tendon becomes weakened or damaged—usually due to overuse, repetitive strain, age-related degeneration, or biomechanical factors such as flat feet—it can no longer generate enough tension to hold the arch up against your body weight. The bones in the middle of your foot start to sag downward, the heel bone tilts outward to compensate, and the entire foot gradually collapses into a flatter, more rolled-out position. From behind, you can see more toes on the affected side because the foot has rotated outward—doctors call this the “too many toes” sign.
PTTD progresses through stages. Stage 1: the tendon is inflamed and painful, but the arch hasn’t collapsed yet. Stage 2: the arch has started to flatten and the heel rolls outward, but the deformity is still flexible—you can manually push the foot back into a more normal position. Stage 3: the deformity becomes rigid—the joints have stiffened in the collapsed position and you can’t manually correct it. Stage 4: the ankle joint itself becomes arthritic due to the abnormal forces caused by the deformed foot position.
What this actually feels like
The typical pattern is pain and tenderness along the inside of your ankle and down into your arch, particularly just behind and below the bony prominence on the inner side of your ankle. The pain is worse during and after weight-bearing activities—walking, standing, stairs—and eases with rest. Your arch aches after you’ve been on your feet for a while, a deep, tired ache that makes you want to sit down and take the weight off. You might notice that your foot looks flatter than it used to, or that your heel tilts outward when you stand. Walking feels effortful and awkward, particularly on uneven ground. You might find yourself limping or walking on the outside edge of your foot to avoid loading the painful inner structures. First thing in the morning, your foot and ankle feel stiff and sore, and those first few steps are uncomfortable until things loosen up.
How the splint helps with PTTD
The rigid side splints resist the outward rolling of your heel, which reduces the strain on the posterior tibial tendon and the other structures on the inside of your ankle. When your heel rolls outward, it stretches the tendon and the ligaments on the inner side of your ankle, aggravating the pain and contributing to progressive collapse. By limiting this rolling movement, the splint reduces the repetitive strain on these structures during walking and standing.
Mind you, the splint provides relatively modest support for PTTD compared to more substantial bracing options such as ankle-foot orthoses (AFOs)—rigid supports that extend from your foot up your lower leg and provide more control over the foot and ankle position.
Realistic expectations and when to get checked
PTTD in the early stages (Stage 1 and early Stage 2) can often be managed conservatively with exercises to strengthen the posterior tibial muscle and other muscles that support the arch, insoles or orthotics that support the arch and control heel position, activity modification (see Chronic Instability section above for detailed strategies), and anti-inflammatory treatments during flare-ups. The splint can be part of this conservative approach, providing additional support during activities that aggravate your symptoms.
But PTTD is a progressive condition. If the arch continues to collapse despite conservative treatment, or if you’re already in Stage 2 with significant deformity, you may need more substantial bracing (such as an AFO) or surgical intervention to reconstruct the tendon, realign the bones, or fuse joints to stop the progression. Surgery becomes more complex and outcomes are less predictable in later stages, so early assessment and treatment are important.
Most people with early-stage PTTD use the splint during prolonged standing, walking, or activities that aggravate their symptoms, and combine it with supportive insoles, strengthening exercises, and activity modification. If you’re seeing steady improvement in pain and function over 8–12 weeks of conservative treatment, you’re on the right track.
Get medical advice if: your arch is visibly flattening or your heel is rolling outward more over time, pain is not improving or is getting worse despite rest and conservative treatment, you’re struggling to walk or stand for normal daily activities, or you’re developing pain in other areas (such as the outside of your ankle, your knee, or your hip) due to altered walking mechanics. Early intervention can slow or stop progression, whereas delayed treatment often means more invasive interventions are needed later. See Safety Guidance section for full list of when to seek assessment.
Post-Fracture Recovery
What happens after an ankle fracture
An ankle fracture is a break in one or more of the bones that make up your ankle joint—usually the tibia (shin bone), fibula (the thinner bone on the outside of your lower leg), or talus (the bone that sits between your shin bones and your heel bone). Fractures happen due to high-impact trauma—falling from height, twisting injuries during sport, car accidents—or in people with weakened bones (such as older adults with osteoporosis), even relatively minor falls can cause fractures.
Treatment depends on the type and severity of the fracture. Stable fractures where the bones are still aligned can often be treated conservatively in a cast or walking boot for 6–8 weeks. Unstable fractures where the bones have moved out of position usually need surgery—metal plates, screws, or rods are used to hold the bones in the correct position while they heal. After the bones have healed sufficiently (confirmed by X-ray), you’re transitioned out of the cast or boot and cleared to start bearing weight and moving your ankle again.
What this actually feels like when you come out of the cast or boot
Your ankle feels weak, stiff, and doesn’t quite feel like it belongs to you. The muscles in your calf and around your ankle have wasted—you can see that your leg looks thinner compared to the other side. Your ankle is stiff and doesn’t move through its full range—pointing your toes down or pulling them up feels restricted and uncomfortable. The skin around your ankle might look pale, dry, or flaky from being covered for weeks. Walking feels strange and effortful. You’re tentative, testing each step, worried about putting your full weight on it. Your ankle aches at the end of the day, a deep, tired ache from muscles and joints that aren’t used to working yet. You might limp heavily at first. First thing in the morning, your ankle is particularly stiff—those first few steps are slow and careful until things loosen up.
How the splint helps during post-fracture recovery
Once you’ve been cleared to bear weight and start moving, the splint provides external support and confidence during the transition phase. Your muscles are weak from weeks of immobilisation, your proprioception is impaired (your brain has lost some of its sense of where your ankle is and how it’s moving), and your ligaments and joint capsule are stiff. The splint gives you the stability and reassurance you need to start walking and doing daily activities again without fear that your ankle will give way or that you’ll re-injure it.
The compression helps manage any residual swelling, which is common in the first few weeks after coming out of a cast or boot. The cushioned heel pad makes walking less jarring and more comfortable as you rebuild tolerance to impact forces.
Realistic expectations, timeline, and when to get checked
Recovery after an ankle fracture is slow—slower than almost anyone expects. The bone itself typically takes 6–8 weeks to heal enough to bear weight, but full recovery—including rebuilding muscle strength, restoring range of motion, and returning to normal activities—takes 3–6 months or longer. Expect to wear the splint during all weight-bearing activities for the first 2–4 weeks after coming out of the cast or boot. During this time, focus on regaining range of motion (gentle exercises to point and flex your foot, draw circles with your toes, rock your ankle side to side) and starting gentle strengthening exercises as advised by your physiotherapist.
By weeks 4–8, you should be walking more confidently and starting to increase your activity level. You can start reducing splint use during easier activities—short walks on flat ground—but continue wearing it during more challenging activities like stairs, longer walks, or uneven ground. By weeks 8–12, most people can reduce to wearing the splint only during sport, exercise, or particularly challenging activities. Some people don’t need it at all by 12 weeks if their strength and confidence have returned fully.
Recovery timelines vary, though. Older adults, people with other health conditions, people who had surgical complications, or people with severe fractures may take longer. Don’t compare your recovery to others or to generic timelines—focus on steady progress week by week.
Get medical advice if: you experience increasing pain or swelling (rather than gradual improvement), sharp pain in a specific spot (particularly if it’s different from the general aching and stiffness you’d expect during recovery), a feeling of instability or episodes of giving way that aren’t improving with time and exercises, reduced range of motion that’s not improving despite doing stretching exercises, or any new symptoms that weren’t present before. These might indicate problems with bone healing (delayed union or malunion—where the bone heals in the wrong position), hardware complications (if you had surgery), or damage to other structures that needs addressing. See Safety Guidance section for full list of when to seek assessment.
Transitioning out of a cast or boot: what to expect and how to progress
In the first week out of cast or boot, your ankle will feel weak, stiff, and vulnerable. This is expected—your muscles have wasted during immobilisation, your ligaments and joint capsule have stiffened, and your proprioception is impaired. Wear the splint during all weight-bearing activities during this first week. Expect fatigue and discomfort—even short walks may feel tiring, and your ankle may ache at the end of the day. This is your ankle adjusting to bearing weight again after weeks of being protected. Focus on regaining range of motion: gentle exercises to point and flex your foot, draw circles with your toes, and rock your ankle side to side within a comfortable range. Don’t push into sharp pain, but mild discomfort and stiffness are normal.
Over weeks 2–4, gradually increase your activity level. Add a few minutes of walking each day, introduce stairs (one step at a time initially, holding the rail), and start doing more household tasks or light work activities. Continue wearing the splint during all these activities. Start gentle strengthening exercises as advised by your physiotherapist—resistance band exercises, pushing your foot against resistance and holding for 5–10 seconds without moving the joint, or simple calf raises holding onto a surface for support. Expect slow progress—it’s normal for recovery to feel frustratingly slow during this phase. Your muscles are rebuilding capacity that was lost during immobilisation, and this takes time.
Around weeks 5–8, most people can start reducing splint use during easier activities by this stage. You might still wear it during longer walks, stairs, uneven ground, or sport and exercise, but you may find you don’t need it for short walks on flat, even surfaces. Continue progressing your strengthening exercises—increase resistance, add more repetitions, or progress to more challenging variations such as single-leg calf raises or balance exercises on unstable surfaces. Your physiotherapist will guide this progression based on your individual recovery.
By weeks 9–12, most people can reduce to wearing the splint only during sport, exercise, or particularly challenging activities such as long walks or uneven ground. Some people don’t need the splint at all by 12 weeks if their strength and confidence have returned fully. Recovery timelines vary, though—some people take longer, particularly if the original fracture was severe, if there were complications, or if other factors such as age or general health affect healing. Focus on steady progress and follow the guidance of your physiotherapist or surgeon.
Common problems: Swelling that increases during the day—elevate your foot for 15–20 minutes every few hours, and check you’re not doing too much activity too soon. Stiffness that’s not improving despite stretching exercises—you may need hands-on physiotherapy (manual therapy) to mobilise the joint and soft tissues. Sharp pain in a specific spot—this might indicate hardware irritation (if you had surgery), delayed bone healing, or other complications. Get it checked. Feeling anxious about bearing weight or moving your ankle—this is common after fractures. Gradual exposure to activities while wearing the splint can help rebuild confidence. Work with your physiotherapist to set small, achievable goals each week.
Post-Surgical Recovery
When surgery is needed
Some ankle injuries and conditions require surgical intervention. Common ankle surgeries include fracture fixation (using plates, screws, or rods to hold broken bones in position), ligament reconstruction (repairing or reconstructing torn ligaments using tissue grafts), tendon repair (reattaching or reconstructing damaged tendons), arthroscopy (keyhole surgery to remove damaged cartilage, bone spurs, or scar tissue), and ankle fusion or replacement (for severe arthritis). After surgery, your ankle is typically immobilised in a cast, boot, or splint for several weeks to protect the surgical repair while the tissues heal.
What post-surgical recovery feels like
Once you’re cleared to start moving and bearing weight, your ankle feels weak, stiff, swollen, and sore. The surgical site may be tender, and you might see scars, bruising, or swelling around the incisions. Your muscles have wasted during the period of immobilisation, your range of motion is restricted, and your proprioception is impaired. Walking feels effortful and uncomfortable. You’re cautious, worried about damaging the repair or causing pain. Your ankle aches after activity, and you might experience sharp twinges or pulling sensations around the surgical site as the tissues stretch and adapt to movement again.
How the splint helps after surgery
Once your surgeon or physiotherapist has cleared you to use external support (rather than the rigid post-operative boot or cast), the splint provides stability and confidence during the transition phase. It protects the healing tissues from excessive stress while allowing you to gradually increase your activity level. The compression helps manage post-operative swelling, which can persist for weeks or months after surgery. The external support compensates for weak muscles and impaired proprioception while you rebuild strength and control through rehabilitation exercises.
Realistic expectations, timeline, and when to get checked
Post-surgical recovery timelines vary depending on the type of surgery, the severity of the original injury or condition, and individual factors such as age and general health. Most ankle surgeries require 3–6 months of rehabilitation before you can return to normal activities, and 6–12 months before you can return to high-impact sport or demanding physical work. Your surgeon and physiotherapist will give you specific timelines and milestones based on your procedure.
Expect to wear the splint during all weight-bearing activities in the first few weeks after transitioning out of the post-operative boot or cast. As your strength and confidence improve, you’ll gradually reduce how often you wear it, eventually only using it during higher-risk activities or not at all once you’ve fully recovered. Follow your surgeon’s and physiotherapist’s guidance closely—progressing too quickly can compromise the surgical repair, but progressing too slowly can lead to stiffness and prolonged weakness.
Get medical advice if: you experience increasing pain, redness, warmth, or swelling around the surgical site (which might indicate infection), discharge or oozing from the incision, fever or feeling generally unwell, sudden sharp pain or a feeling that something has “given way” (which might indicate the repair has failed), or lack of progress despite following rehabilitation advice. Post-surgical complications are uncommon, but early detection and treatment are important if they occur. See Safety Guidance section for full list of when to seek assessment.
Post-surgical rehabilitation: combining the splint with exercises
Typical post-surgical progression: Weeks 0–6 (immobilisation phase): Your ankle is protected in a cast or boot. You’re not bearing weight or moving the joint. Weeks 6–8 (early mobilisation): You’re cleared to start gentle range-of-motion exercises and partial weight-bearing. Wear the splint during all weight-bearing activities. Weeks 8–12 (progressive loading): You’re cleared for full weight-bearing and start strengthening exercises. Continue wearing the splint during daily activities, but start reducing use during easier activities as strength improves. Weeks 12+ (functional restoration): You’re progressing to more challenging exercises, sport-specific drills, and return to normal activities. Wear the splint only during higher-risk activities or not at all once cleared by your surgeon.
Common problems: Pain during exercises—some discomfort is normal as tissues stretch and adapt, but sharp pain or pain that persists for more than 24 hours after exercise means you’re doing too much. Reduce intensity and discuss with your physiotherapist. Swelling that increases after activity—elevate your foot, apply ice for 15–20 minutes, and check you’re not progressing too quickly. Stiffness that’s not improving—you may need hands-on physiotherapy to mobilise scar tissue and stiff joints. Anxiety about damaging the repair—this is common. Work with your physiotherapist to understand what’s safe at each stage, and trust that gradual, guided progression won’t compromise the repair.
Other Conditions That May Benefit
The splint may also help manage symptoms in several other ankle and foot conditions where side-to-side stability, compression, or proprioceptive feedback are beneficial. These conditions get briefer coverage here because they’re either less common reasons people buy this type of brace, or because the splint plays a more supportive role alongside other primary treatments. Here’s an overview of each:
Ankle arthritis (osteoarthritis)
Arthritis in the ankle joint causes pain, stiffness, swelling, and reduced range of motion due to wear and tear of the cartilage that normally cushions the joint surfaces. The rigid side splints limit excessive movement that can aggravate arthritic joints, and the compression may help manage swelling during flare-ups. Most people with ankle arthritis use the splint during prolonged standing, walking, or activities that aggravate their symptoms, and combine it with pain management strategies, exercises to maintain range of motion and strength, and activity modification (see Chronic Instability section for detailed strategies).
Peroneal tendinopathy
The peroneal tendons run down the outside of your ankle and help control outward rolling movements and stabilise the outer side of your foot. When these tendons become overloaded or damaged, they cause pain and tenderness along the outer side of your ankle, particularly just behind and below the bony prominence on the outside. The splint’s compression and side support may help manage symptoms during activities, though—like Achilles tendinopathy—the primary treatment is a structured exercise programme to strengthen the peroneal muscles and rebuild the tendons’ capacity to handle load.
Sinus tarsi syndrome
The sinus tarsi is a small tunnel on the outer side of your ankle, between the talus (the bone that sits between your shin bones and heel bone) and heel bone, filled with ligaments, nerves, and fatty tissue. Sinus tarsi syndrome causes pain and tenderness in this area, often after an ankle sprain or due to chronic instability. The pain is typically worse on uneven ground and during activities that involve side-to-side movements. The splint’s side-to-side stability may reduce the repetitive stress on the structures in the sinus tarsi during walking and activity.
High ankle sprains (syndesmosis injuries)
A high ankle sprain—also called a syndesmosis injury—involves damage to the ligaments that hold the two shin bones (tibia and fibula) together just above the ankle joint. These injuries typically happen during twisting or rotational forces—common in rugby, football, and skiing. High ankle sprains are often more severe and slower to heal than standard lateral ankle sprains. The splint provides some support, but high ankle sprains often require more substantial immobilisation initially (such as a walking boot) and a longer period of protected weight-bearing. Discuss with your physiotherapist or doctor whether this splint is appropriate for your specific injury, or whether you need more rigid support.
Tarsal coalition
Tarsal coalition is a condition where two or more of the small bones in the middle or back of your foot are abnormally joined together (either by bone, cartilage, or fibrous tissue), restricting normal movement and causing pain and stiffness. It’s usually a congenital condition (present from birth) that becomes symptomatic during adolescence or early adulthood as the bones mature. The splint may help manage symptoms during activities by limiting movement that stresses the abnormal joint, though definitive treatment often involves orthotics, physiotherapy, or in some cases, surgery to separate the fused bones or fuse them completely to eliminate painful movement.
Important note: If you have any of these conditions and are unsure whether this splint is appropriate for your situation, speak to your GP, physiotherapist, podiatrist, or orthopaedic specialist before purchasing. They can assess your specific condition, identify the underlying problem, and recommend the most appropriate treatment and support for your needs.
How to Use the Splint
Fitting the splint
The FootReviver Rigid Ankle Brace is designed to fit either your left or right foot. The two rigid metal splints are built into fabric side panels that sit on the inner and outer sides of your ankle, and you position them on whichever ankle you’re supporting.
Step 1: Put on a thin sock or stocking. The splint can be worn directly against skin, but most people find it more comfortable over a thin layer of fabric, which reduces friction and absorbs moisture.
Step 2: Position the splint around your ankle. The two rigid side panels should sit on the inner and outer sides of your ankle, with the cushioned heel pad sitting under your heel. The fabric should wrap smoothly around your lower leg and ankle without bunching or twisting.
Step 3: Fasten the two adjustable elastic straps. Each strap has a buckle at the front. The straps are positioned one above the other on your lower leg—in the “ankle tube” area above your heel. Thread each strap through its buckle, pull it snug, then fold the end back on itself to secure it with the hook-and-loop fastener. The straps wrap around your lower leg and upper ankle, crossing over the back (Achilles area) and fastening at the front. Start with the lower strap (closest to your ankle), then fasten the upper strap (around your lower leg). Pull the straps snug enough that you feel firm, even support around your ankle, but not so tight that it causes discomfort, numbness, tingling, or restricts circulation. You should be able to slide one finger under the straps comfortably.
Step 4: Slide your foot into your shoe. The splint is designed to be worn inside roomier lace-up shoes, trainers, or boots. It won’t fit comfortably inside very tight or narrow shoes, slip-on shoes, or shoes with rigid ankle collars. Choose footwear with enough room to accommodate the splint without pinching or causing pressure points. The splint can also be worn without shoes during rest or indoor use.
Step 5: Check the fit. Stand up and take a few steps. The splint should feel supportive and secure without slipping down or moving around inside your shoe. Your ankle should feel stable when you tilt your foot side to side, but you should still be able to point your toes down and pull them up comfortably. If the splint feels too loose, tighten the straps. If it feels too tight or causes any numbness, tingling, or discomfort, loosen the straps.
Adjusting throughout the day
Swelling changes during the day and throughout your recovery. In the early stages after an injury or surgery, swelling is typically highest first thing in the morning and increases again during the day as you’re on your feet. As you heal, swelling gradually reduces. Check the fit of the splint several times a day and adjust the straps as needed. If your ankle swells during the day, you may need to loosen the straps slightly. As swelling reduces over weeks, you may need to tighten the straps to maintain a snug, supportive fit.
In the early stages of recovery—whether from a sprain, fracture, or surgery—swelling fluctuates significantly. The splint’s adjustable straps let you adapt the compression throughout the day and across your recovery timeline. Tighter compression in the first few weeks helps manage acute swelling by squeezing excess fluid out of the tissues. As swelling reduces and your ankle stabilises, you can adjust to a lighter, more comfortable level of compression that still provides support without feeling restrictive. This adaptability means the splint remains effective and comfortable from early recovery through to return to activity, rather than becoming too loose or too tight as your condition changes.
How long to wear it each day
How long you wear the splint depends on your condition and your stage of recovery. In the early stages after an acute injury or surgery, most people wear it during all weight-bearing activities—walking, standing, stairs, household tasks—and remove it during rest periods to let the skin breathe and check for any irritation. As you progress and your ankle gets stronger, you can start reducing how long you wear it each day, eventually only using it during higher-risk activities such as sport, uneven ground, or long walks.
For chronic conditions such as chronic instability, arthritis, or tendinopathy, most people use the splint selectively—wearing it during activities that aggravate symptoms or challenge the ankle, and removing it during easier activities or rest periods. This selective approach maintains your ankle’s natural function and strength during easier activities, while providing protection and confidence during activities that need more support.
Skin care and hygiene
Check your skin regularly for any signs of irritation, redness, or pressure sores, particularly in the first few days of wearing the splint. If you notice any areas of rubbing or discomfort, adjust the position of the splint or add extra padding (such as a thin foam pad or additional sock layer) over the affected area. If irritation persists, stop using the splint and seek advice from a healthcare professional.
The splint can be hand-washed in warm water with mild detergent. Allow it to air-dry completely before wearing it again. Don’t tumble dry or use direct heat, as this can damage the elastic and fabric components. With regular daily use, the splint should maintain its support level for several months. If the straps lose elasticity or the splint no longer feels supportive even when fastened snugly, it may be time to replace it.
Wearing the splint during exercise and sport
The splint can be worn during sport and exercise—such as walking, running, gym training, or recreational activities like tennis or golf—to provide additional stability and confidence during these activities. It’s not suitable for contact sports (rugby, football, martial arts) or water-based activities.
For rehabilitation exercises designed to rebuild your ankle’s natural strength and control, you should remove the splint so your muscles and nervous system learn to control the ankle independently. Your physiotherapist will guide you on when to wear the splint during activity and when to remove it during exercises.
Combining with other treatments
The splint works well alongside other ankle treatments. If your physiotherapist tapes your ankle for additional support during sport, you can wear the splint over the tape—the tape provides direct skin-level support, and the splint adds external stability. If you use insoles or orthotics for arch support or biomechanical correction, wear them inside your shoes as normal; the splint sits around your ankle and doesn’t interfere with foot orthoses. Ice can be applied before or after wearing the splint to manage swelling and pain—remove the splint, apply ice for 15–20 minutes, then put the splint back on if you’re continuing activity. Anti-inflammatory medications—often called NSAIDs—such as ibuprofen can be used alongside the splint to manage pain and swelling during flare-ups, but follow the dosing instructions and check with your GP or pharmacist if you have any health conditions that affect whether NSAIDs are safe for you. If you’re having physiotherapy, your physio may use treatments such as ultrasound, manual therapy, or exercise therapy—the splint doesn’t interfere with any of these; just remove it during treatment sessions.
Safety Guidance
When not to use this splint
Don’t use this splint if you’ve been advised that your ankle needs rigid immobilisation in a cast or walking boot. Using flexible support too early after certain injuries or surgeries can compromise healing or cause bones or surgical repairs to move out of position. Only use the splint once your medical team has explicitly cleared you to bear weight with flexible support.
Don’t use this splint if you have an unstable fracture, a severe ligament rupture that requires complete rest, active infection or open wounds around your ankle, or severe circulation problems or reduced sensation in your foot or ankle. If you have diabetes, peripheral vascular disease, or any condition that affects circulation or sensation in your feet, speak to your GP or specialist before using any ankle support, as you may not be able to feel if the splint is too tight or causing pressure damage.
Blood clot warning
Ankle and foot injuries increase your risk of developing blood clots (deep vein thrombosis), which can be life-threatening if a clot travels to your lungs (pulmonary embolism). This splint does not prevent or treat blood clots.
If you develop pain, warmth, swelling, and redness in one calf—particularly if the affected leg feels heavy or tender—seek urgent medical attention immediately. If you experience sudden shortness of breath, chest pain (particularly when breathing deeply), rapid heart rate, coughing up blood, or feeling faint or dizzy, call 999 or go to your nearest A&E department immediately. These are signs of a pulmonary embolism—a medical emergency.
If you’ve recently had an ankle injury, fracture, or surgery, discuss your blood clot risk with your doctor or fracture clinic team. They may recommend additional measures such as blood-thinning medication or compression stockings to reduce your risk. Being immobile or less active than usual increases blood clot risk, so follow your medical team’s advice about safe mobilisation and any preventive treatments you may need.
Circulation and nerve warnings
If your toes go numb, tingly, or start looking pale, blue, or purple, the splint is too tight. Loosen it straight away. If symptoms don’t resolve within a few minutes, remove the splint completely and get medical advice. In the first few days, while you’re getting used to the fit, check your circulation a few times a day using this simple test: press on one of your toenails until it goes pale, then release—the colour should return within 2 seconds. If it takes longer, or if your toes feel cold or look discoloured, the splint may be restricting circulation.
If you experience sharp, shooting pains, burning sensations, or areas of numbness that persist even after loosening or removing the splint, stop using it and seek medical advice. These symptoms might indicate nerve compression or other complications that need assessment.
Skin irritation and pressure sores
Check your skin regularly for any signs of redness, irritation, blistering, or broken skin, particularly over bony prominences such as the ankle bones or the top of your foot. If you notice any areas of concern, stop using the splint and seek advice from a healthcare professional. People with reduced sensation (such as those with diabetes or nerve damage) are at higher risk of developing pressure sores without realising, so extra vigilance is needed.
Worsening symptoms
If your symptoms are getting worse rather than gradually improving, if you develop new or unexplained symptoms, if you experience sudden, severe pain or a feeling that something has “given way”, or if you have any concerns about your recovery, stop using the splint and seek medical advice. The splint is a supportive aid, not a treatment for underlying conditions. If your condition is deteriorating, you need further assessment to identify the cause and adjust your treatment plan.
When to get checked
Seek assessment from your GP, physiotherapist, podiatrist, or orthopaedic specialist if:
- Pain is not improving or is getting worse despite wearing the splint and following rehabilitation advice
- You cannot bear weight comfortably or walk without severe pain
- Swelling is increasing rather than gradually reducing
- Your ankle keeps giving way or feels very unstable despite wearing the splint
- You develop signs of infection: increasing redness, warmth, swelling, discharge, or fever
- You have concerns about blood clots (see warning above)
- You’re unsure whether this splint is appropriate for your condition
- You experience any of the condition-specific red flags mentioned in the sections above
Early assessment can identify problems before they become more serious and ensure you’re getting the right treatment for your specific condition.
Allergic reactions
If you develop a rash, itching, or other signs of irritation after wearing the splint, stop using it and seek medical advice. Some people may be sensitive to the materials used in the splint’s construction.
Not a substitute for medical advice
This splint is designed to support your ankle and manage symptoms during recovery or during activities that challenge your ankle. It doesn’t diagnose conditions, cure injuries, or replace the need for proper medical assessment and treatment. If you’re unsure whether this splint is appropriate for your situation, or if you have any concerns about your ankle, speak to your GP, physiotherapist, podiatrist, or orthopaedic specialist before purchasing or using the splint.
Sizing and Fit
The FootReviver Rigid Ankle Brace is available in three sizes to ensure a secure, comfortable fit. A splint that’s too small will be uncomfortable and may restrict circulation, while one that’s too large won’t provide adequate support and may slip or move around during activity—so getting the right size matters.
Size guide
The splint is sized by your approximate UK shoe size:
- Small: UK shoe size 3–5
- Medium: UK shoe size 5–8
- Large: UK shoe size 8–11
If your shoe size falls on the boundary between two sizes, consider the following: if you have significant swelling, choose the larger size to accommodate fluctuations in swelling throughout the day and during your recovery. If swelling is minimal or has already resolved, choose your normal shoe size bracket for a more secure, supportive fit. If you’re unsure, contact our customer service team for guidance before ordering.
Checking the fit
Once you’ve put the splint on and fastened the straps, check the following. The rigid side panels should sit flat against the inner and outer sides of your ankle without digging in or causing pressure points. The fabric should wrap smoothly around your lower leg and ankle without bunching, twisting, or creating folds that could cause irritation. The straps should be snug enough that the splint feels secure and supportive, but not so tight that they cause discomfort, numbness, tingling, or leave deep marks in your skin—you should be able to slide one finger comfortably under the straps. The splint shouldn’t slip down or move around when you walk or move your ankle. You should still be able to move your ankle up and down (pointing your toes and pulling them up towards your shin) comfortably, but side-to-side rolling movements should be restricted.
If the splint doesn’t meet these criteria, you may need a different size or you may need to adjust the positioning and strap tension.
Returns and exchanges
We offer a 30-day money-back guarantee. If the splint isn’t suitable for your needs once you’ve tried it, you can return it for a full refund within 30 days of purchase, provided it’s in clean, original condition. If you need to exchange for a different size, contact our customer service team and we’ll arrange the exchange. See our returns policy on our website for full details.
If you’re recovering from a sprain, transitioning out of a boot, or managing chronic instability, this splint gives you the side-to-side support you need while still letting you walk, do stairs, and gradually return to normal activities. It works best alongside exercises that rebuild your ankle’s natural strength and control—not as a replacement for them.
The rigid metal splints built into the side panels protect you from the rolling movements that cause injury and instability, the adjustable compression helps manage swelling and adapts to your changing needs throughout recovery, and the proprioceptive feedback can improve your sense of control and confidence during activities that would otherwise feel risky. The cushioned heel pad absorbs impact with every step and provides a stable base for the side splints to work from, with a slight lift that supports and guides your heel position without significantly raising your foot inside your shoe.
For acute injuries like sprains, the splint protects healing ligaments during the vulnerable early weeks while you’re rebuilding strength and range of motion. For chronic conditions like instability or tendinopathy, it provides support during flare-ups or higher-risk activities while your exercises work on the underlying problem. For post-fracture or post-surgical recovery, it bridges the gap between rigid immobilisation and full return to activity, giving you the confidence and protection you need during the transition phase.
The splint isn’t appropriate for everyone, though. If you’ve been told your ankle needs rigid immobilisation, if you have an unstable fracture or severe ligament rupture, if you have active infection or severe circulation problems, or if you haven’t been cleared to bear weight by your medical team, this splint isn’t suitable. If you’re unsure whether it’s right for your situation, check with your physio or GP before you buy.
We offer a 30-day money-back guarantee, so if it’s not suitable once you’ve tried it, you can return it for a full refund provided it’s in clean, original condition. Sizing is based on your UK shoe size—measure carefully and use our size guide to choose the right fit. If you need help with sizing or have questions about whether this splint is appropriate for your condition, contact our customer service team.
Medical Disclaimer
This information is here to help you understand how the splint works and whether it’s right for you—but it’s not a substitute for proper medical advice. The FootReviver Rigid Ankle Brace is designed to provide external support and symptom management for various ankle conditions. It’s not a medical device intended to diagnose, treat, cure, or prevent any disease or medical condition. Individual results vary, and the effectiveness of the splint depends on many factors including the nature and severity of your condition, your overall health, your adherence to rehabilitation exercises and adjusting your activities, and other treatments you may be receiving.
Before using this splint, particularly if you’ve recently sustained an ankle injury, undergone surgery, or have any underlying health conditions (such as diabetes, peripheral vascular disease, or conditions affecting circulation or sensation), you should seek assessment and advice from an appropriate healthcare professional such as your GP, physiotherapist, podiatrist, orthopaedic surgeon, or fracture clinic team. They can assess your specific condition, confirm whether this type of support is appropriate for your situation, and provide guidance on how to use it safely and effectively as part of your overall treatment plan.
If you experience any worsening of symptoms, new or unexplained symptoms, signs of complications (such as increasing pain, swelling, redness, warmth, numbness, tingling, colour changes, or signs of infection), or any concerns about your recovery while using this splint, stop using it and seek medical advice promptly. Don’t delay seeking medical attention if you have symptoms that might indicate serious complications such as blood clots, infection, or failure of healing.
The content on this page has been prepared with care and is based on current understanding of ankle injuries and conditions. Medical knowledge evolves, though, and individual circumstances vary. We don’t guarantee that the information is complete, accurate, or up-to-date for your specific situation. Always rely on the advice of your own healthcare providers, who can assess your individual circumstances and provide personalised recommendations.
By using this splint, you’re confirming you’ve read this information and understand the safety guidance. If you have any questions or concerns, please contact our customer service team or consult with a qualified healthcare professional before use.
NuovaHealth
Supporting your recovery with evidence-informed products and guidance.
For questions or support, contact us at: Sales@NuovaHealth.co.uk
2 Reviews For This Product
Fast & Secure Checkout Through Paypal
Pay with Paypal the secure payment gateway that accepts all credit and debit cards. Paypal is free and secure and no credit or bank information is ever stored or shared with us.
Fast Dispatch
Enjoy your items soon with quick dispatch via Royal Mail. Expect to have your items between 1-3 working days for domestic orders. 7-10 Working days for international orders.
Return Policy – 30 Day Money Back Guarantee
In the unlikely event, you are unhappy with your purchase you can return it within 30 days for a refund. Please contact us via the form on the contact us page to start your return.
To return an item please send it to: Nuova Health UK, 81 Highfield Lane, Waverley, Rotherham, S60 8AL. Please include a note with your order id so we know who to refund. Please retain your postage receipt as proof of postage. All that we ask is that the item is in the original packaging and unused.

by Andrew
Bought this after spraining my ankle and it has really helped support and strengthen my ankle up again. Would 100% recommend!
by Elly
After a minor ankle sprain, I decided to give the Ankle Brace a whirl. It’s been a revelation! The quality is stellar and it’s made my recovery a breeze. Absolute thumbs up!